So you've got a camera you don't know how to use? Part 2 [Savannah Photography Mentor]
Hi friends! Welcome back! I hope you found part one on how to use your camera in manual mode helpful! You can always refer back to that at any time— the link for it is right here!
A few things I want to recap before jumping into the next lesson—
Shooting manual mode will allow YOU to control the camera rather than let it be in control and decide for you. You’ve got smart skills and know how to tell it who’s boss, haha! Be brave, flip your switch to manual mode and start practicing those basic skills. Things will start to click into place and make sense THE MORE YOU PRACTICE!
YOUR GEAR DOES NOT MATTER (right now)! I mentioned this before, but just use what you’ve got! Having a fancy and expensive camera and lens will not make you a better photographer or allow you take better photos of your families. The gear does not make the photographer!! Knowing and understanding how your camera works and how you can tell it what to do will get you better photos, period. Heck, most of the stuff I’m about to teach you in the upcoming lessons will apply even for phone photos, so use what gear you’ve got, and don’t rush off to spend a ton of money on gear right now OK!? If you decide you like photography and want to invest in nice (aka more expensive gear that will allow you to DO MORE AFTER KNOWING YOUR BASICS) then you can start researching what types of camera/lenses you may want. I will ALWAYS recommend a nifty fifty (aka a 50mm lens) to start with for your first lens purchase. You can get a really nice f/1.8 for around $100 and if you’ve got extra you can opt for the f/1.4. Personally I am asked a LOT about what gear I use and what you should buy and use. I will always share what I shoot with (again, you can find that post right here covering all my gear), but how I shoot and what I shoot may not be for you!
*Something to ponder before making purchases— if you don’t know the difference between a full frame and crop sensor cameras, you will want to learn what those are and how different lenses will work and perform based on the type of sensor your camera has. There’s a ton of info about this online, but here’s some to get your started:
- Crop Vs Full Frame: Which Camera Do You Need?
- Full Frame vs Crop Sensor: Which Camera is Right for You? from Pretty Presets
- The Highly Recommended Nifty Fifty Lens- What’s So Special?
- Which is better: 35mm vs 50mm lens
- What is Focal Length and What Focal Length Should I Use? especially helpful for learning differences in focal length which we talked about before
- Best Budget DSLR Lenses for BeginnersI answered questions from y’all over on my instagram! Go check it out here! (It’s under the highlight tab of photog tips!)
OK! Now on to lighting! Before we get going, I want to share some other AWESOME free resources with you. Cole’s Classroom did a really great six part series on finding the light that explains all the different types of lighting and how to find and use them in your photos. I highly recommend reading all six parts to it and then continuing on with my lesson.
You can find that series RIGHT HERE!
Ok, so using different types of lighting is my fave and I hope you can be inspired by lighting too! And this lesson is going to be super fun because I’ve got an awesome guest teacher, Lola Vargas! I met Lola while I was living in Clarksville, and she’s an amazing momma to two precious little boys, an Army wife, and a Veteran too! She’s incredibly talented and inspires me ALL THE TIME! She’s extremely skilled at capturing her own family’s lives with beautiful documentary/lifestyle images and is the perfect teacher for all things around indoor lighting, which is what she’s going to cover for us here today! You can find more of her amazing work over on her Instagram right HERE!
As a reminder, each block of instruction I’ll have a blog post like this one here, as well as videos in the post (like the one below), to teach you the basics. You can either just watch the videos first (if you’d like to just have them all in one place, you can click here for the entire playlist) and then read everything, or break it up into your own pace/chunks. And, if at the end of each lesson, you find that you have any questions, you can comment below on this blog post, or message me on social media! Be sure to follow along there as I will go live after each lesson in order to try and help you learn even more! 🙌🏻
I’m keeping it simple and breaking it into two main categories and then will talk about a bunch of different ways to use the type of light in those scenarios. More specifically, Lola and I will be covering the following:
Types and scenarios of lighting
Outdoor
- back lighting
- front lighting
- side lighting
- harsh lighting
- spotty/dappled lighting
- even light/shade
- cloudy days
- golden hour(s)Indoors
- back light
- front light
- side light
- dim and artificial light
Part One: Outdoors
Remember how I’m a work smarter, not harder type of gal? OK, great, now here’s some really good explanations with examples about the different types of light:
Understanding Front Light, Back Light, & Side Light
Front Light vs Side Light vs Back Light
When and How to Use These 8 Types of Lighting
Natural Light Photography: A Guide to Getting that Glow
Four Different Kinds of Outdoor Natural Portrait Light You Should Look For
A Guide to Different Types of Light and Weather Conditions
What is the Best Lighting for Photography? A Beginners Guide to Light
BONUS: You can use this sun tracker tool here to know when sunrise and sunset is in your area; this is how I figure out when to do my client sessions by the way!
I have two different videos broken up into chunks, with one on back, front, and side lighting and the other on harsh spotty/dappled lighting, even light/shade, cloudy days, and the golden hour(s).
Backlighting
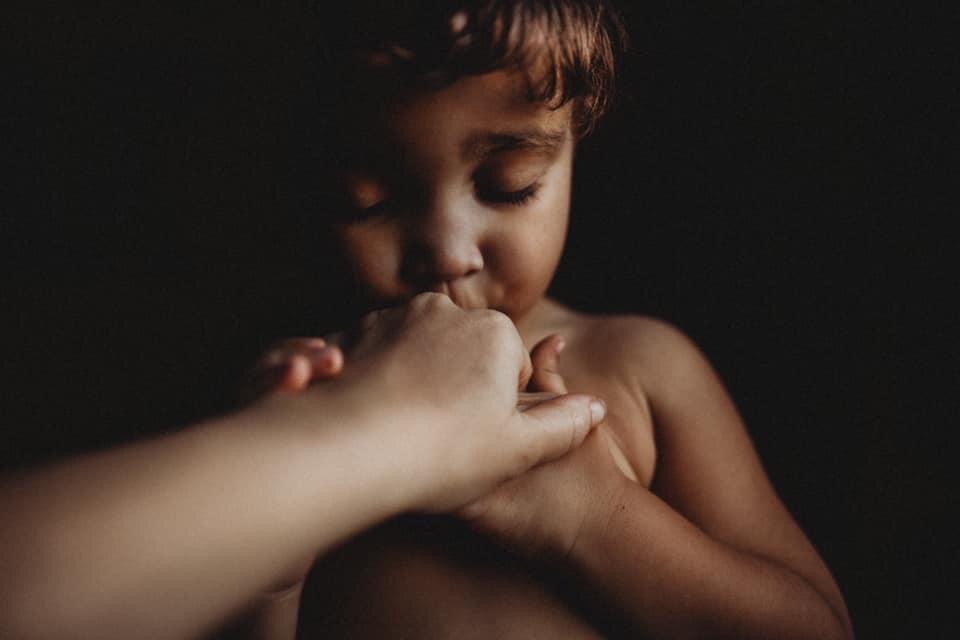
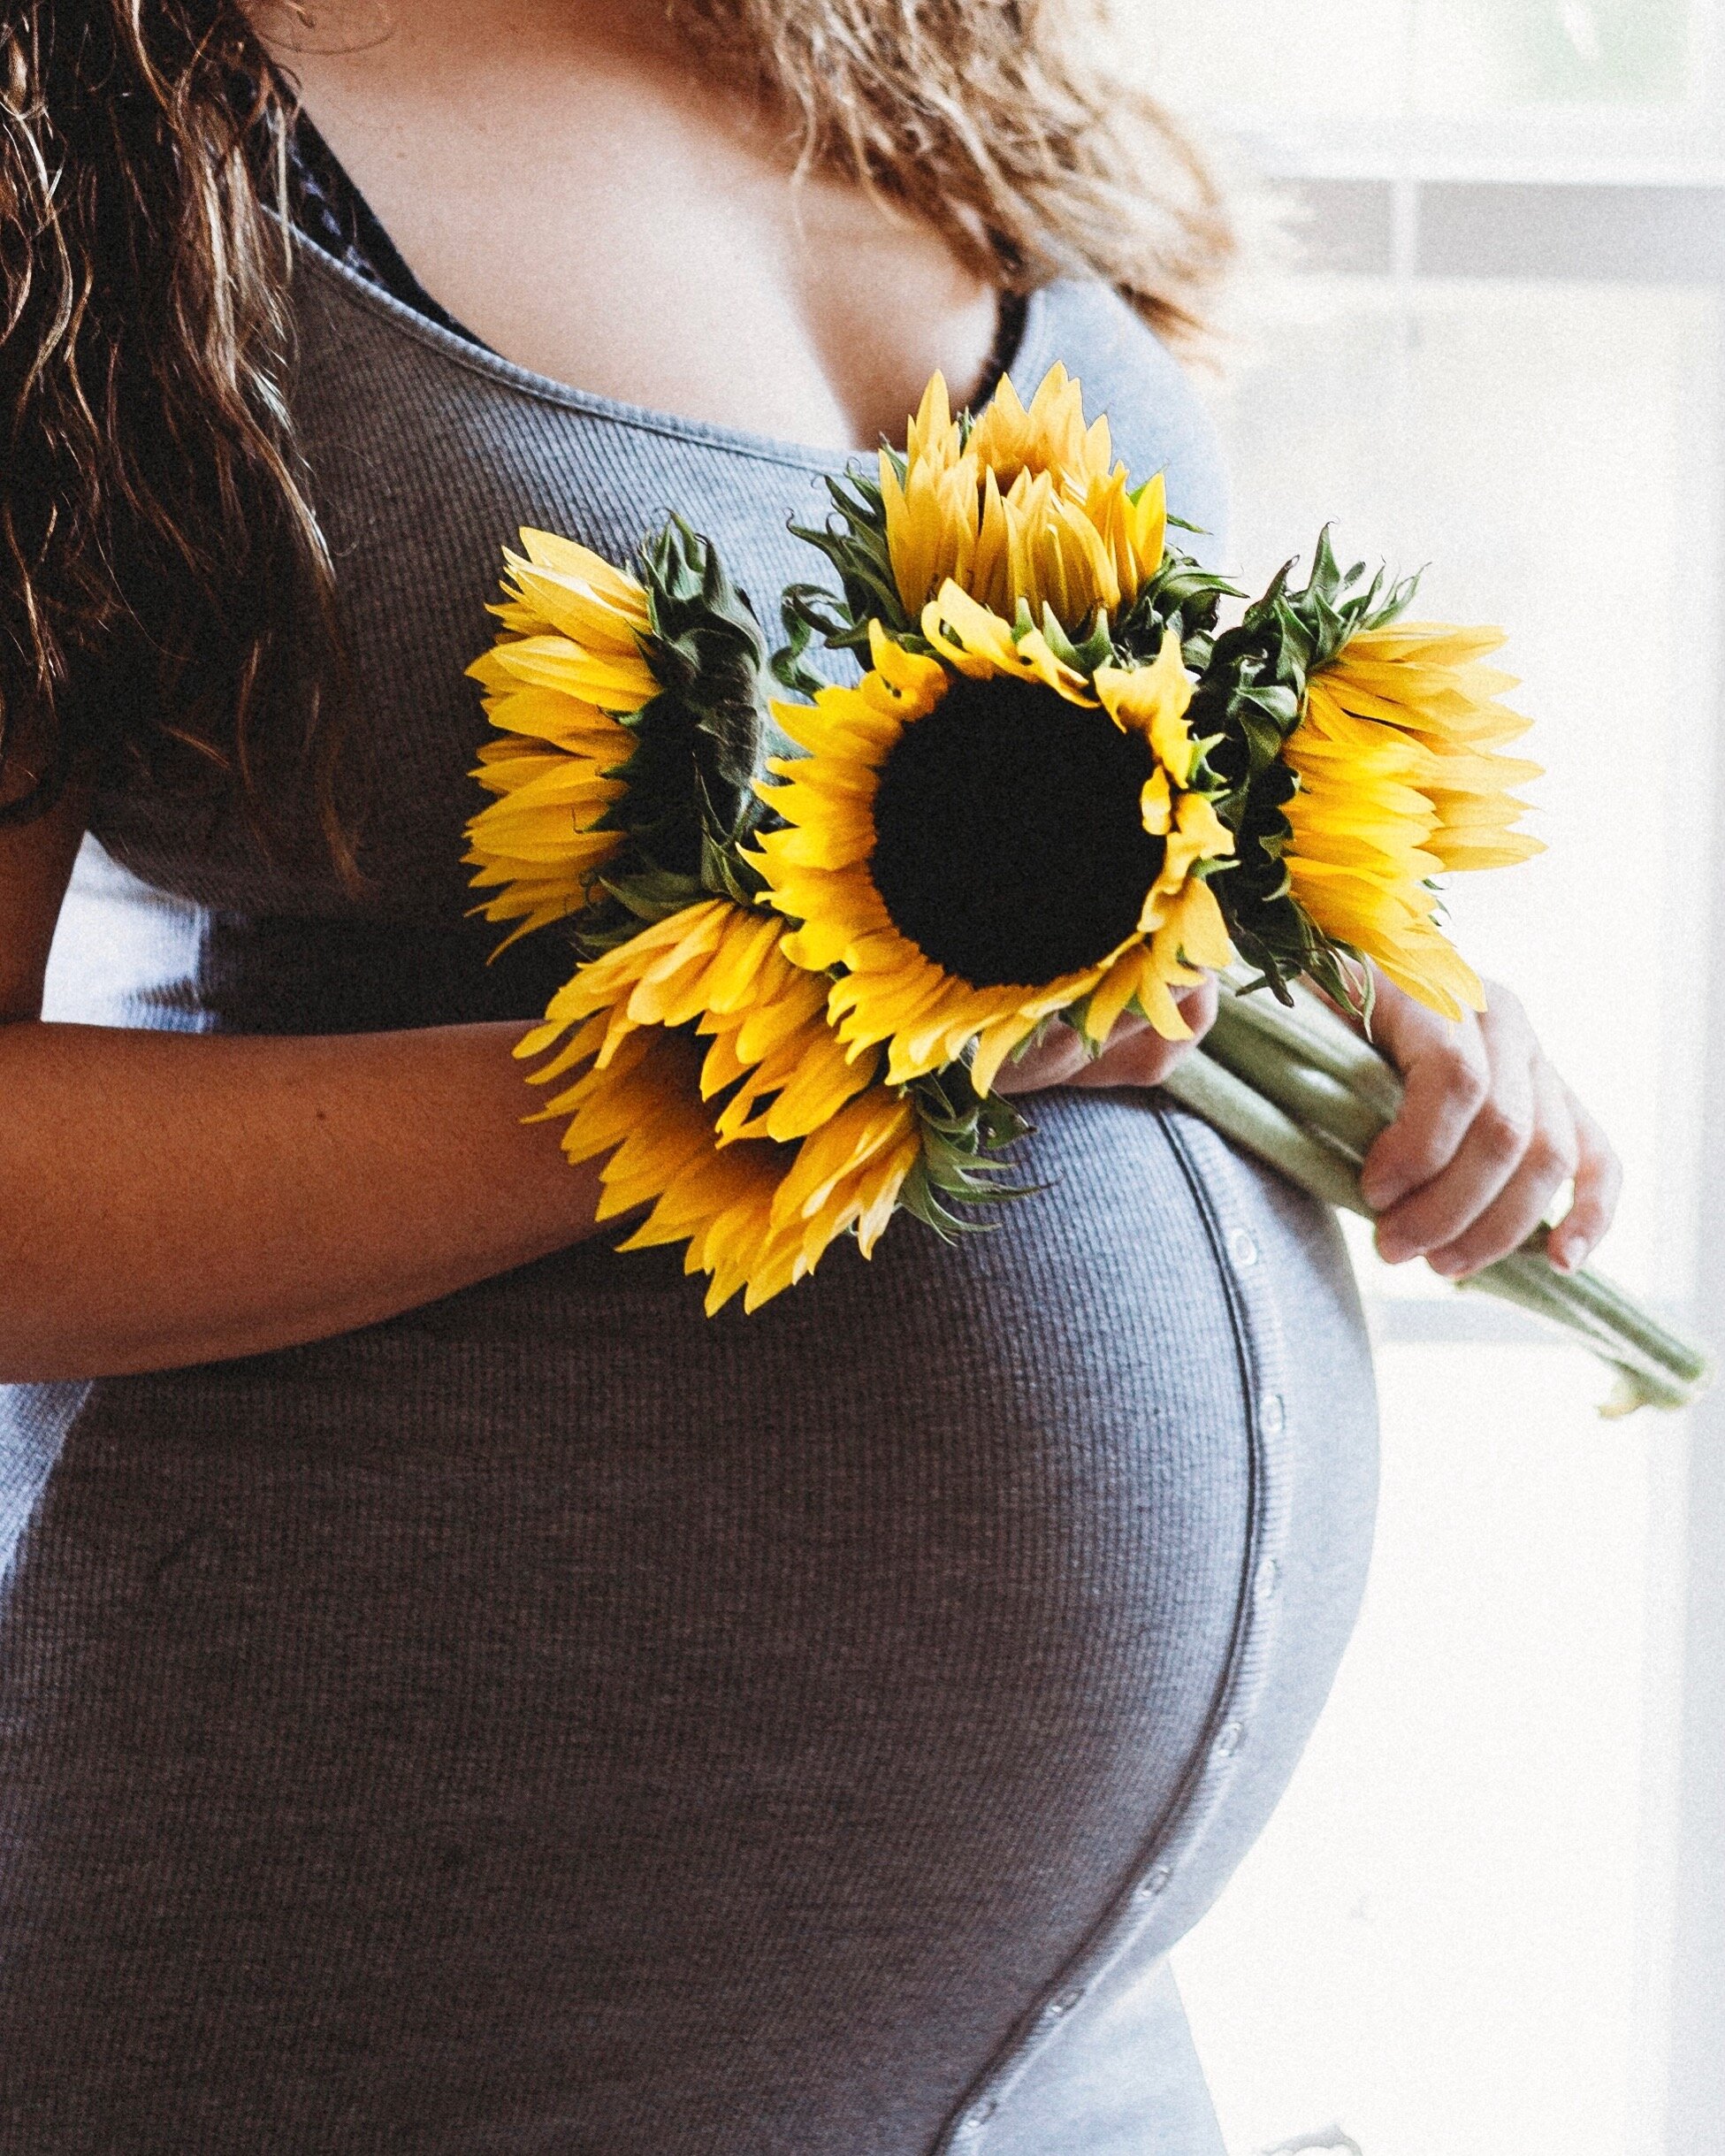
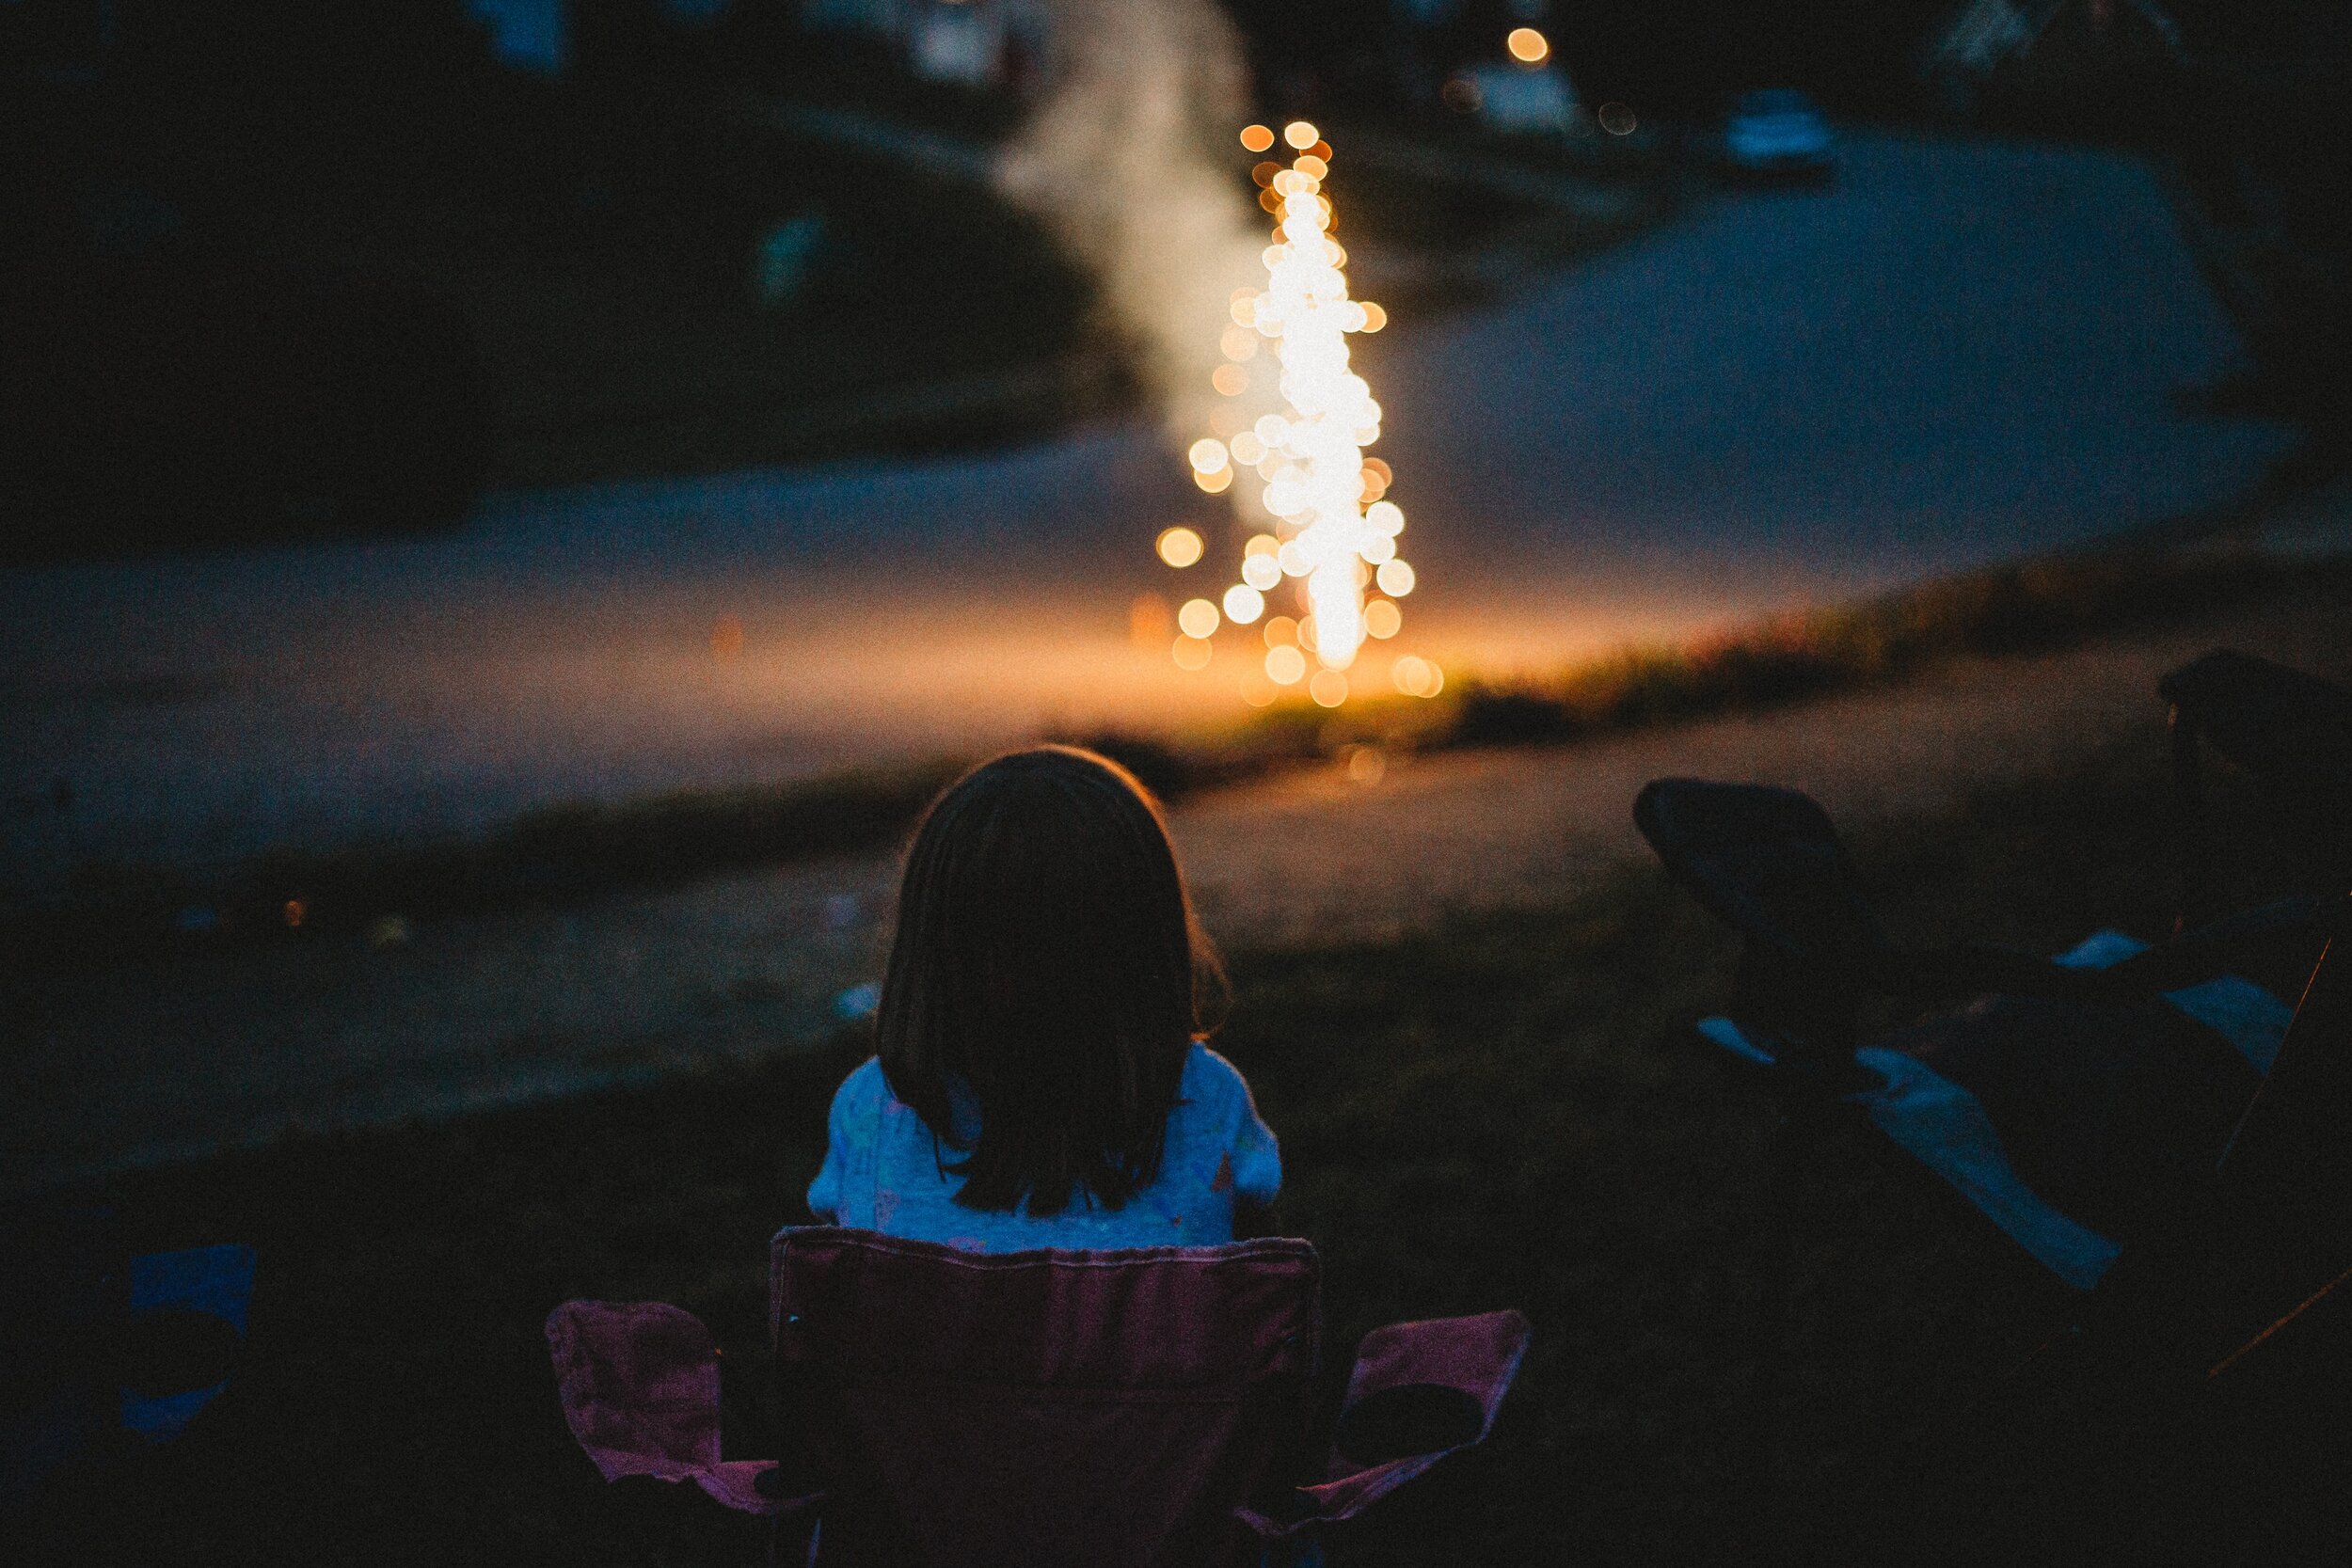
Now let’s get going! After perusing the articles above you should have a bit of a clue about what I’m chatting about. I’m going to start with my favorite type of light, which I know I might have said in my video that I don’t have faves, but I do, and it’s totally back lit for outdoors! I love to shoot during the golden hour when the sun is literally illuminating my subjects backs! Think of a diagram where in a row you have the sun, then your subject in front of the sun, and then you in front of your subject taking their photo where the sun is behind them. This can be hard to achieve because so much light is hitting your camera’s sensor, and it can sometimes not focus properly, wash out your subject, and/or cause too much sun flare/washout.
To nail these shots, check out these articles below for all the tips on back lighting—
How to Take More Amazing Photos with Natural Backlighting
Wow Future Clients with Stunning Backlight Photography
Here are some examples of what I mean:

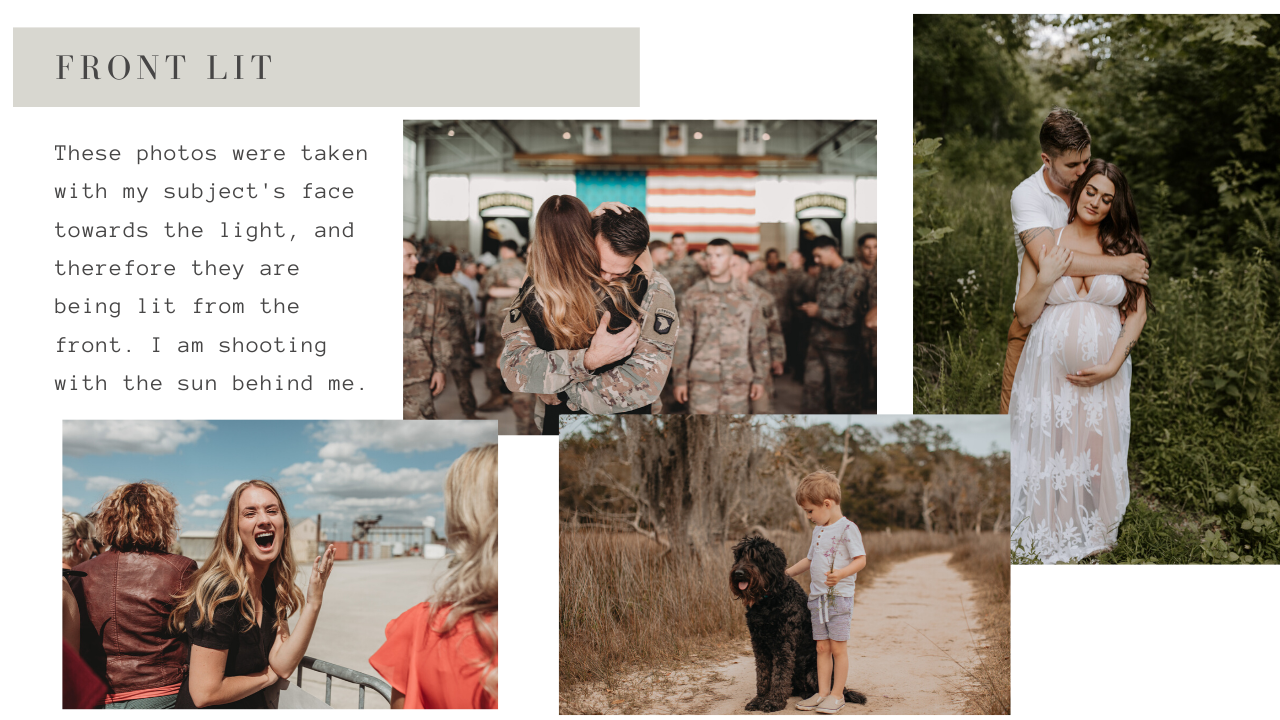
Front Lighting
Next is front light, and it’s just how it sounds, you are having the light in front of your subject. So thinking about our diagram, it would be the light, then you in front of the light shooting your subject looking at the light. It’s easiest to think about this indoors where you have a window as your light source, then you with the camera standing in front of the window shooting with your back to the window! This lighting can be kind of flat sometimes, but that can also mean even light on your subject.
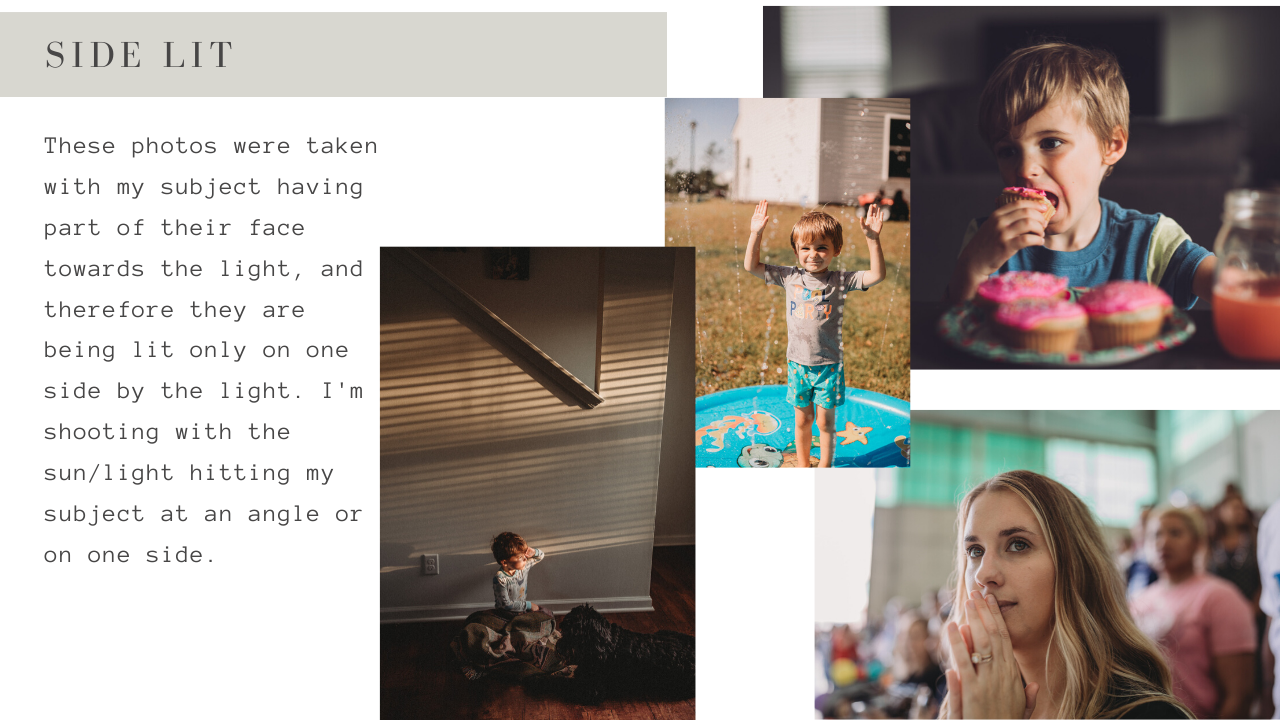
Side Lighting
Side lighting, much like how it sounds, means you are having the light at an angle and only one side of your subject is in the light. So thinking about our diagram, the subject is sideways to the light and you’re shooting either in front, behind, or at an angle to the subject. Look at the photo examples below to see what I mean!
Harsh Lighting
This is just what it sounds like— harsh! The light will be the most harsh at high noon in direct sunlight. You can still shoot in harsh lighting, but you will want to find some nice, open and even shade to put your subject in. Try to have your subject back lit for these photos, and try not to stress too much if your background is blown out because it’s too bright. I explain a bit more about this below, but you can check out these resources to learn more in depth:
How to Shoot in Harsh Light
How to Shoot Beautiful Portraits in Harsh Sunlight
Top 14 Tips on Taking Photos in Harsh Sun
How to Embrace Shooting in Harsh Light
How to Shoot Portraits in Harsh Light

Dappled/Spotty Lighting
This is when you have found shade, but it has hot spots and is dappled or spotty. When you’re shooting in this scenario, aim to have your subject’s face in an even pocket of shade. It’s ok if other parts of them perhaps aren’t in complete shade, but at least have their faces with even lighting so it won’t be distracting for your photo.

Even Lighting & Shade
This is what you are seeking out when it’s not golden hour— even light through shade (specifically you want open shade, which I don’t go into detail about). Here’s some great articles about what different types of even lighting/shade is and how to find and use shade:
What’s So Great About Open Shade Anyway?
How to Find and Use Open Shade for Your Photography
What is Flat Light? (And Other Kinds of Light Photographers Talk About)
How to Shoot in Open Shade
How to Find and Use Open Shade
Open Shade Lighting for Photography

Cloudy Days
I don’t think I need to explain what a cloudy day is. You can use these to your advantage! Clouds are your friends, friend! 🙂

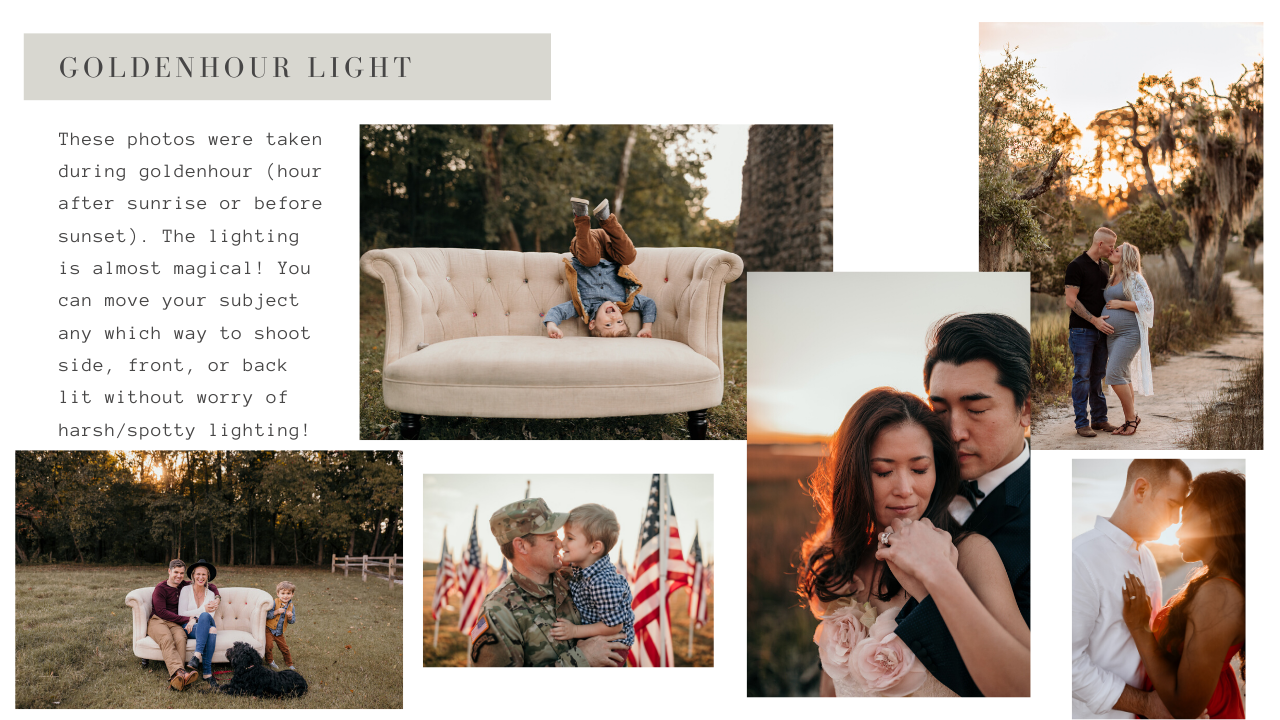
The Holy Grail of PRETTY LIGHTING: Golden Hour(s)
This is the first hour after sunrise and the last hour before sunset when you can pretty much do whatever you want with positioning your subject relevant to the light! I try to do all of my client sessions during this time. I won’t beat this type of lighting to death, just know it’s the best time for photos, but it doesn’t mean its the only time you can shoot! I also really love sunrise golden-hour because its cooler in the morning on those hot summer days, and it’s so soft and nice!
A few final notes about all types of lighting:
When you’re shooting into the sun with your subject backlit (and if it’s harsher sun), you can get sun flares, and/or it can be hard for your camera to find something to focus on (i.e. your subject). If you find it difficult to shoot into the sun and having your subject backlit, use your subjects body to block the sun. This can give them a halo/rim type affect of lighting around them. Remember to aim for even exposure on their faces. Your sky will likely be blown out because you’re exposing for their face, but that’s OK because for your purposes we want just the emotions/memories captured. When I’m shooting backlit, I’m exposing for the sky because I know I can bring up exposure to see my subjects’ faces in editing. You can try doing this too but just know for right now its OK if you’re blowing out your background (i.e. the background is super bright!) as long as your subject is evenly exposed!
I love shooting front lit when I’m inside, especially for selfies with my cell phone camera. This type of lighting is nice and even and I know my face is properly exposed!
Side lighting is great for highlighting certain parts of your subject and can be very dramatic! I like to use it artistically to add interest when I’m inside!
I try to avoid shooting in bright harsh sunlight when I’m outside in the middle of the day. But sometimes, there’s not much I can do about wanting to capture a moment, so I just make sure to either seek out shade, or have my subject’s back to the sun to avoid them squinting. Be careful of dappled light and always double check you don’t have hot spots on your subject’s face as they can be very distracting and can’t be saved in editing.
Shade and clouds are your friends for when you’re shooting in harsh sun! Seek out nice even, open shade to get some good lighting.
When shooting on a cloudy day, always be aware of where the sun is! Your subject can still squint with clouds, and you will want to ensure you’re still positioning them how you want in relation to the sun. Bonus tip— try to have your subject raise their chins a bit to avoid having dark circles on their eyes when it’s cloudy out!
Golden hour is really the most ideal lighting scenario when outside. This can be both after sunrise and right before sunset! You will get nice soft, even lighting in that last (or first!) hour. Don’t be discouraged if it still seems harsh exactly one hour before sunset, as I’ve come to find the best lighting is truly the last 30 mins before sunset or the first 30 mins after sunrise, so really a half-hour instead of the full 60 mins sadly!
There’s also a lighting situation called blue hour… which comes right after goldenhour and is the last hour of lighting where it seems just that- blue- outside. You still have light available but the sun has set. I don’t talk about this in the videos or provide examples, but just know it is a thing and you can totally play around with shooting then too!
*Julie’s general rules of thumb: I love shooting back lit, the end. Haha, just kidding! I will make whatever type of lighting situation work, but my ideal scenario is backlit during golden hour. It’s just my style and preference and everyone has their own!
Part Two: Indoors
And now it’s time to bring in Lola! She is amazing, and she really shines with indoor lighting and how to use light creatively to highlight emotion and storytelling. Using her tips, I’m sure you will quickly learn how to look for and use different types of lighting in your own family’s photos and story. Take it away Lola! 😘
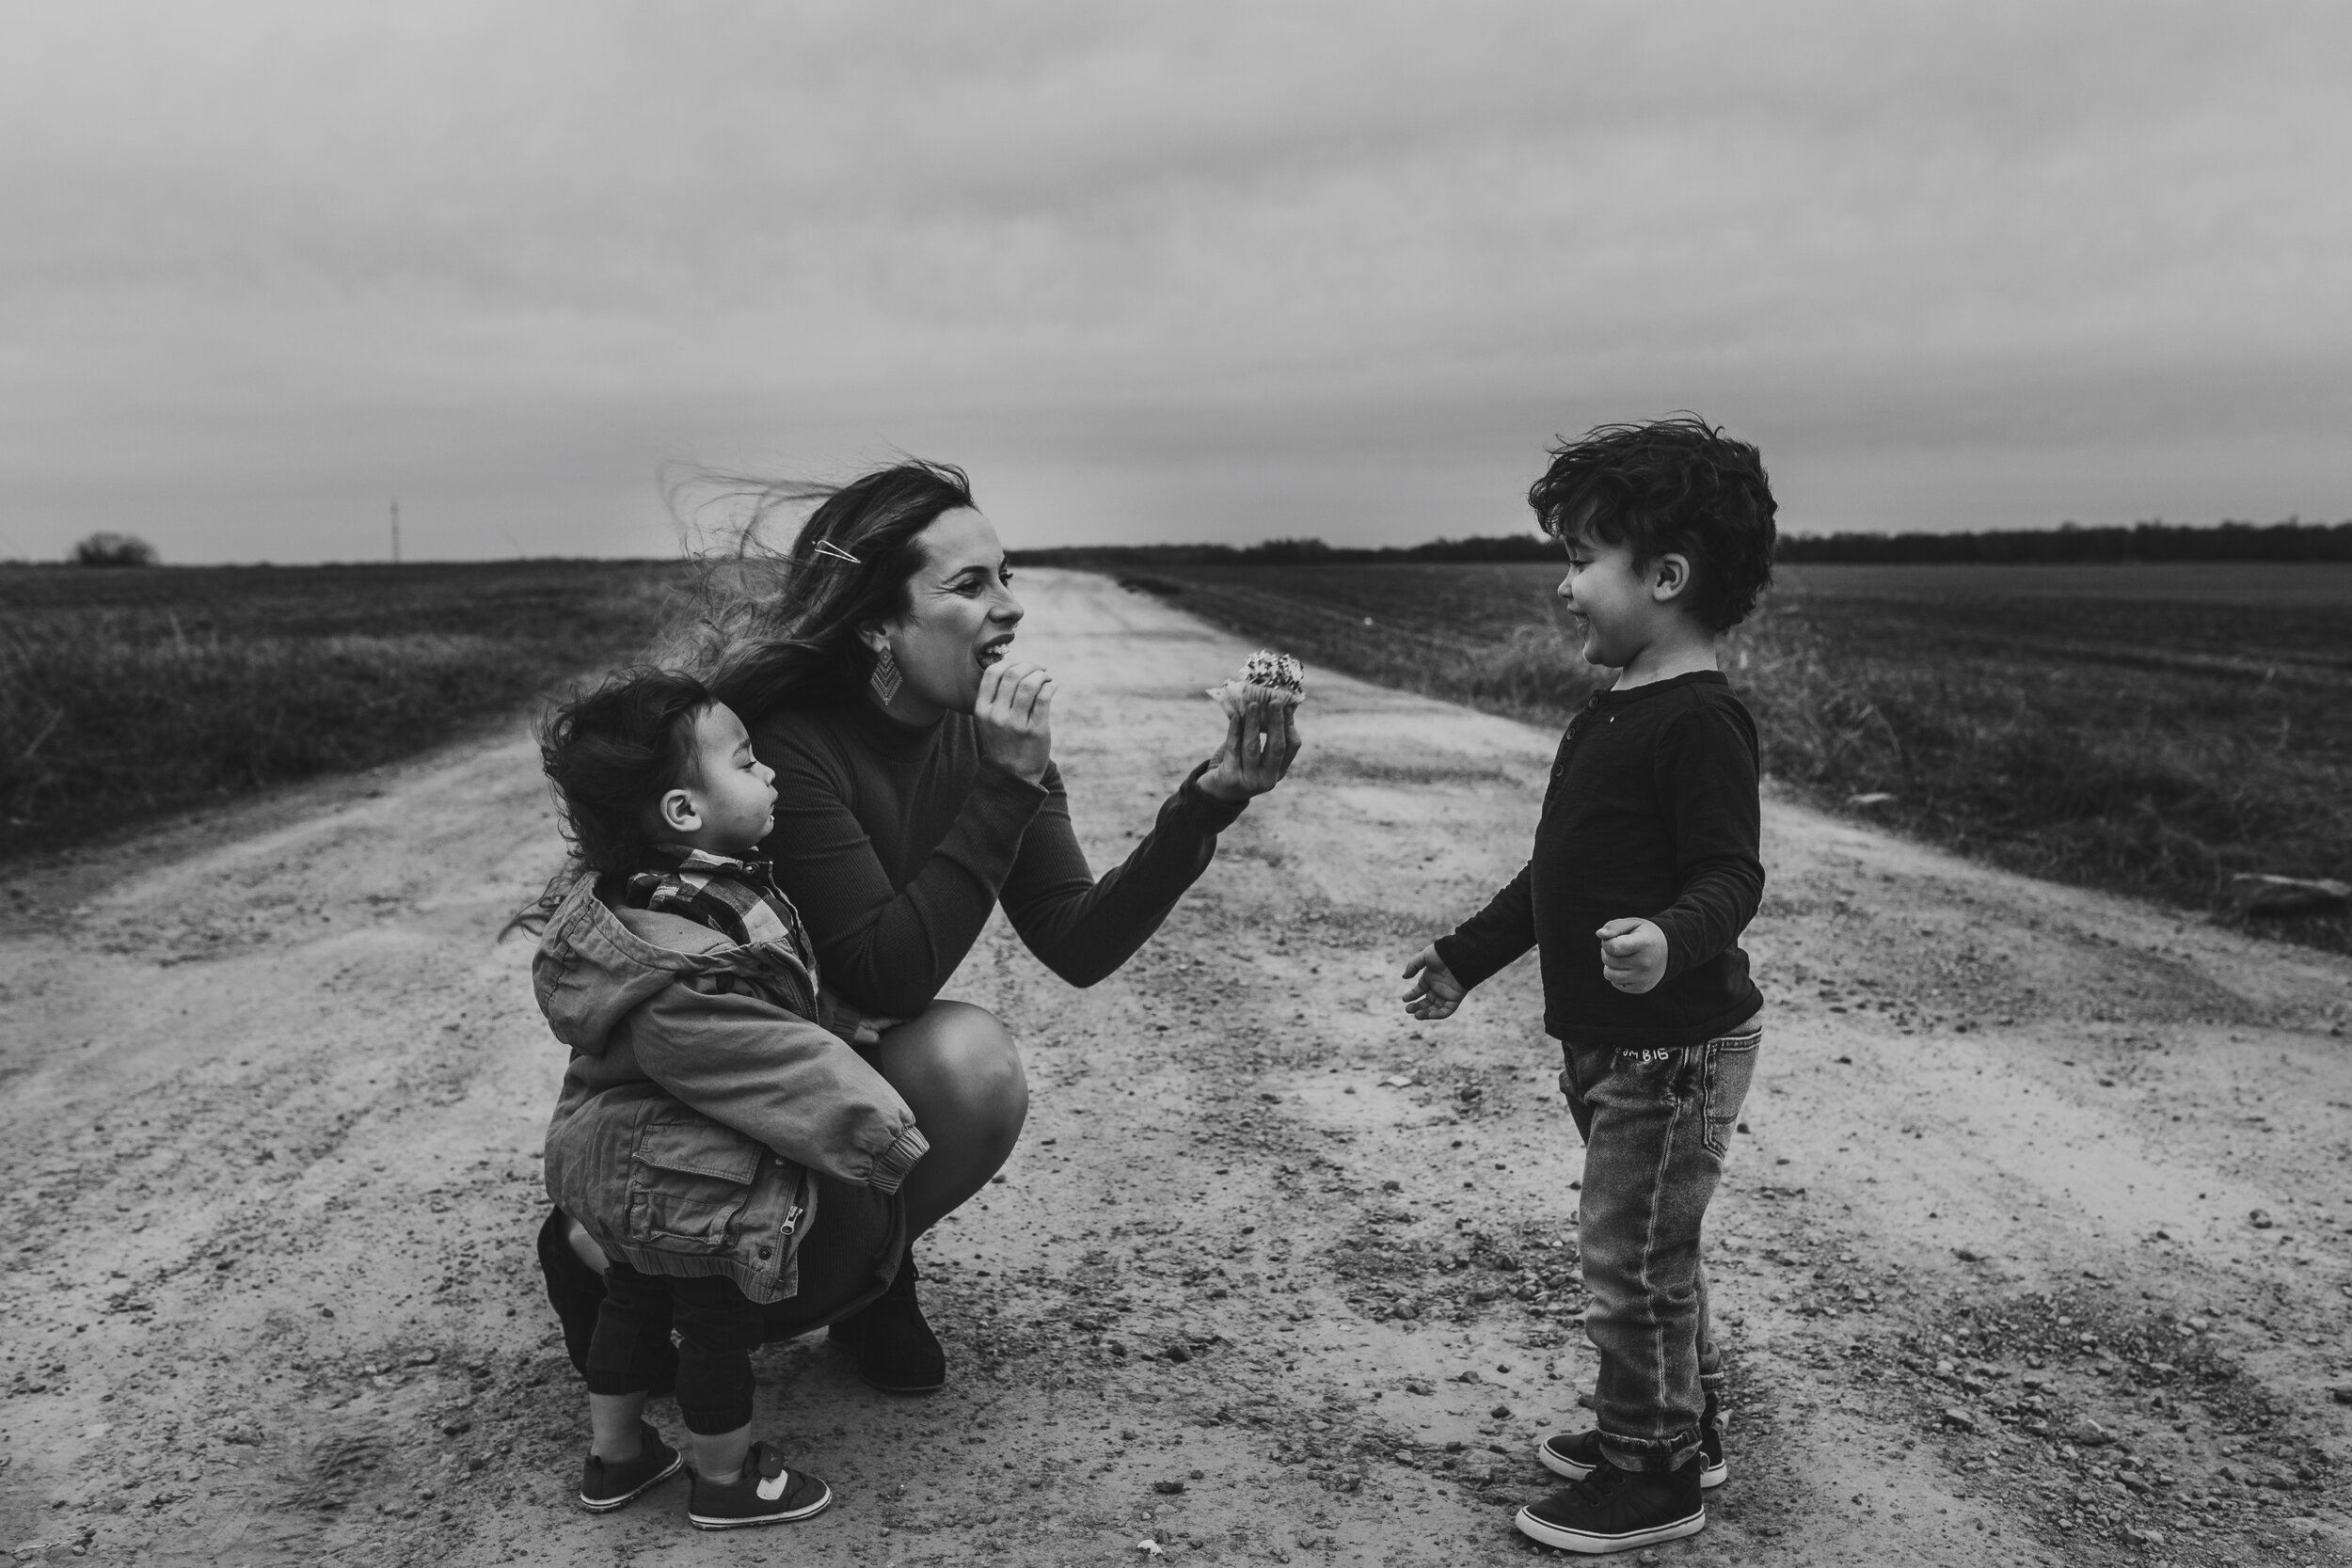

Hi beautiful people. I’m Lola and I’m an indoor light-loving lunatic. I love to capture the beauty of everyday life. I journal through my photography.
When I first started photography, I thought I could only use golden hour light. I was scared a bit of indoor light. But as I got more and more into photography, I learned to embrace other forms of light. This eventually led me to focus on documentary-style photography. I fell in love with documentary photography. I love capturing real life. With documentary photography, you don’t choose your light source, you just gotta learn how to work with what you have. Most of the time, I find myself shooting in low light situations. Call me crazy, but I absolutely love low light. To learn to shoot in low light, I highly suggest learning to work your camera in manual mode, as well as, learning the lighting inside your home. It took a lot of practice and observing to master low light. I know you can get there too. Just practice. With that said, let’s talk about light indoors.
Without light, you can’t make an image.
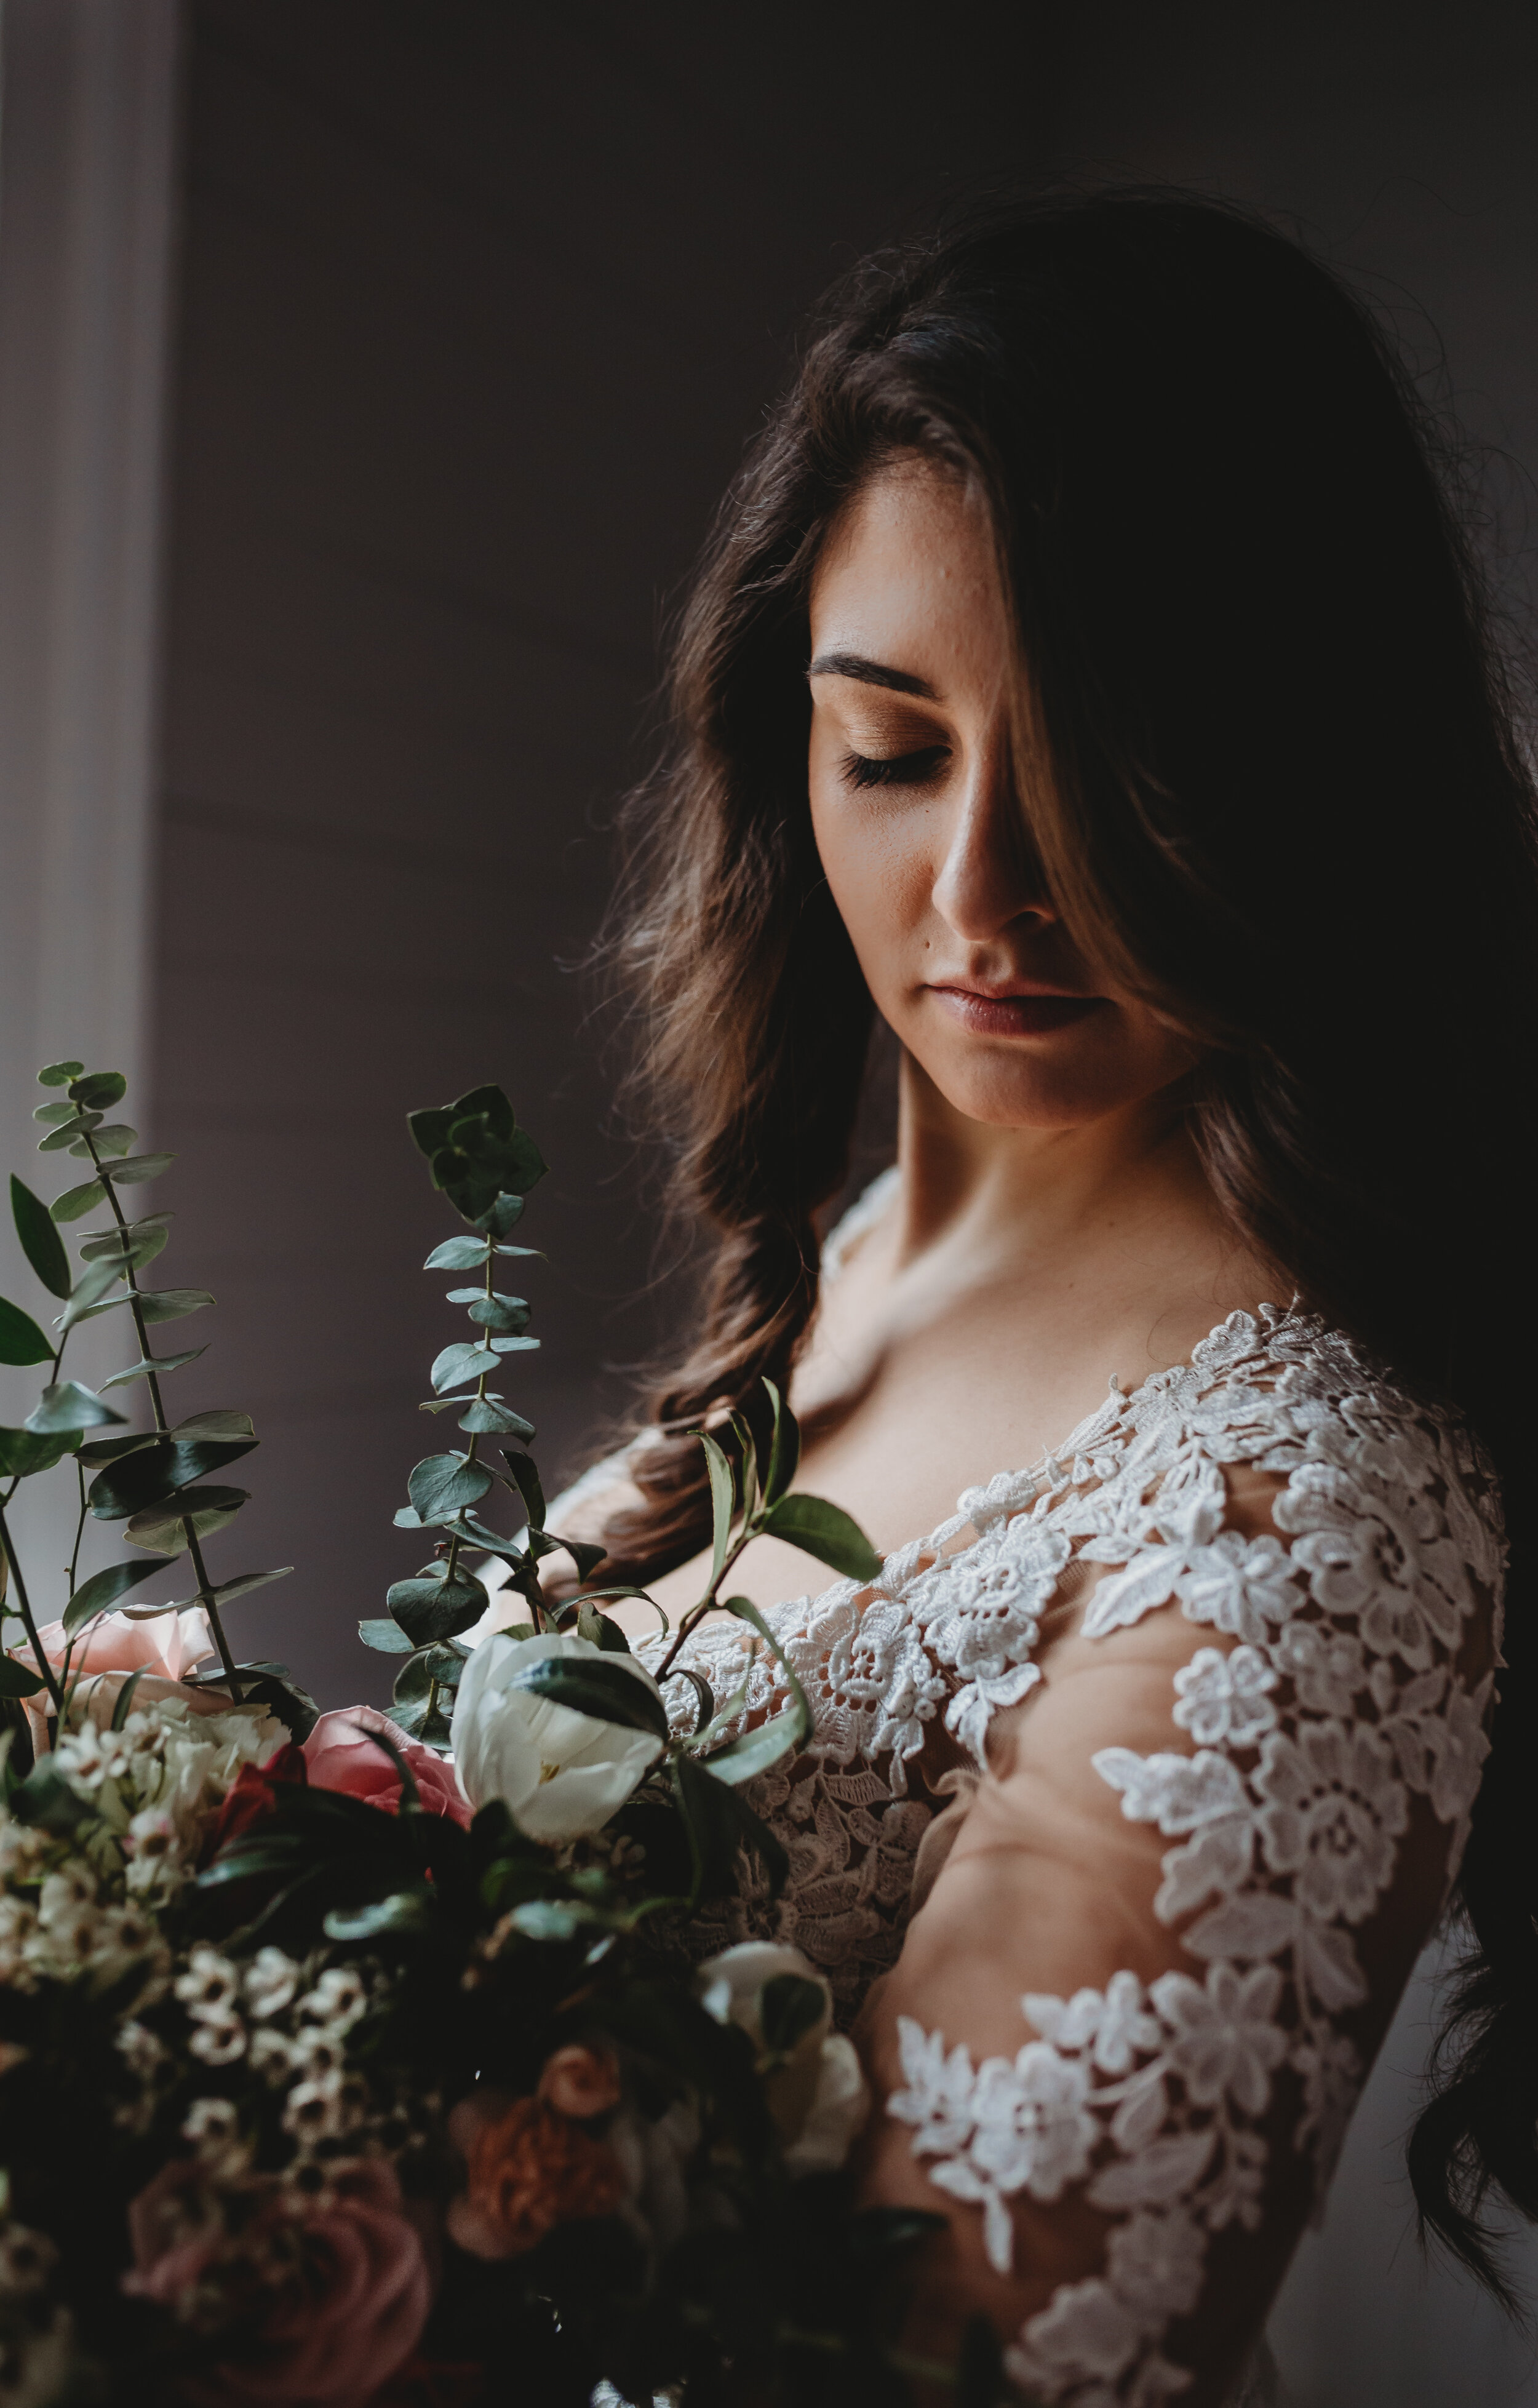
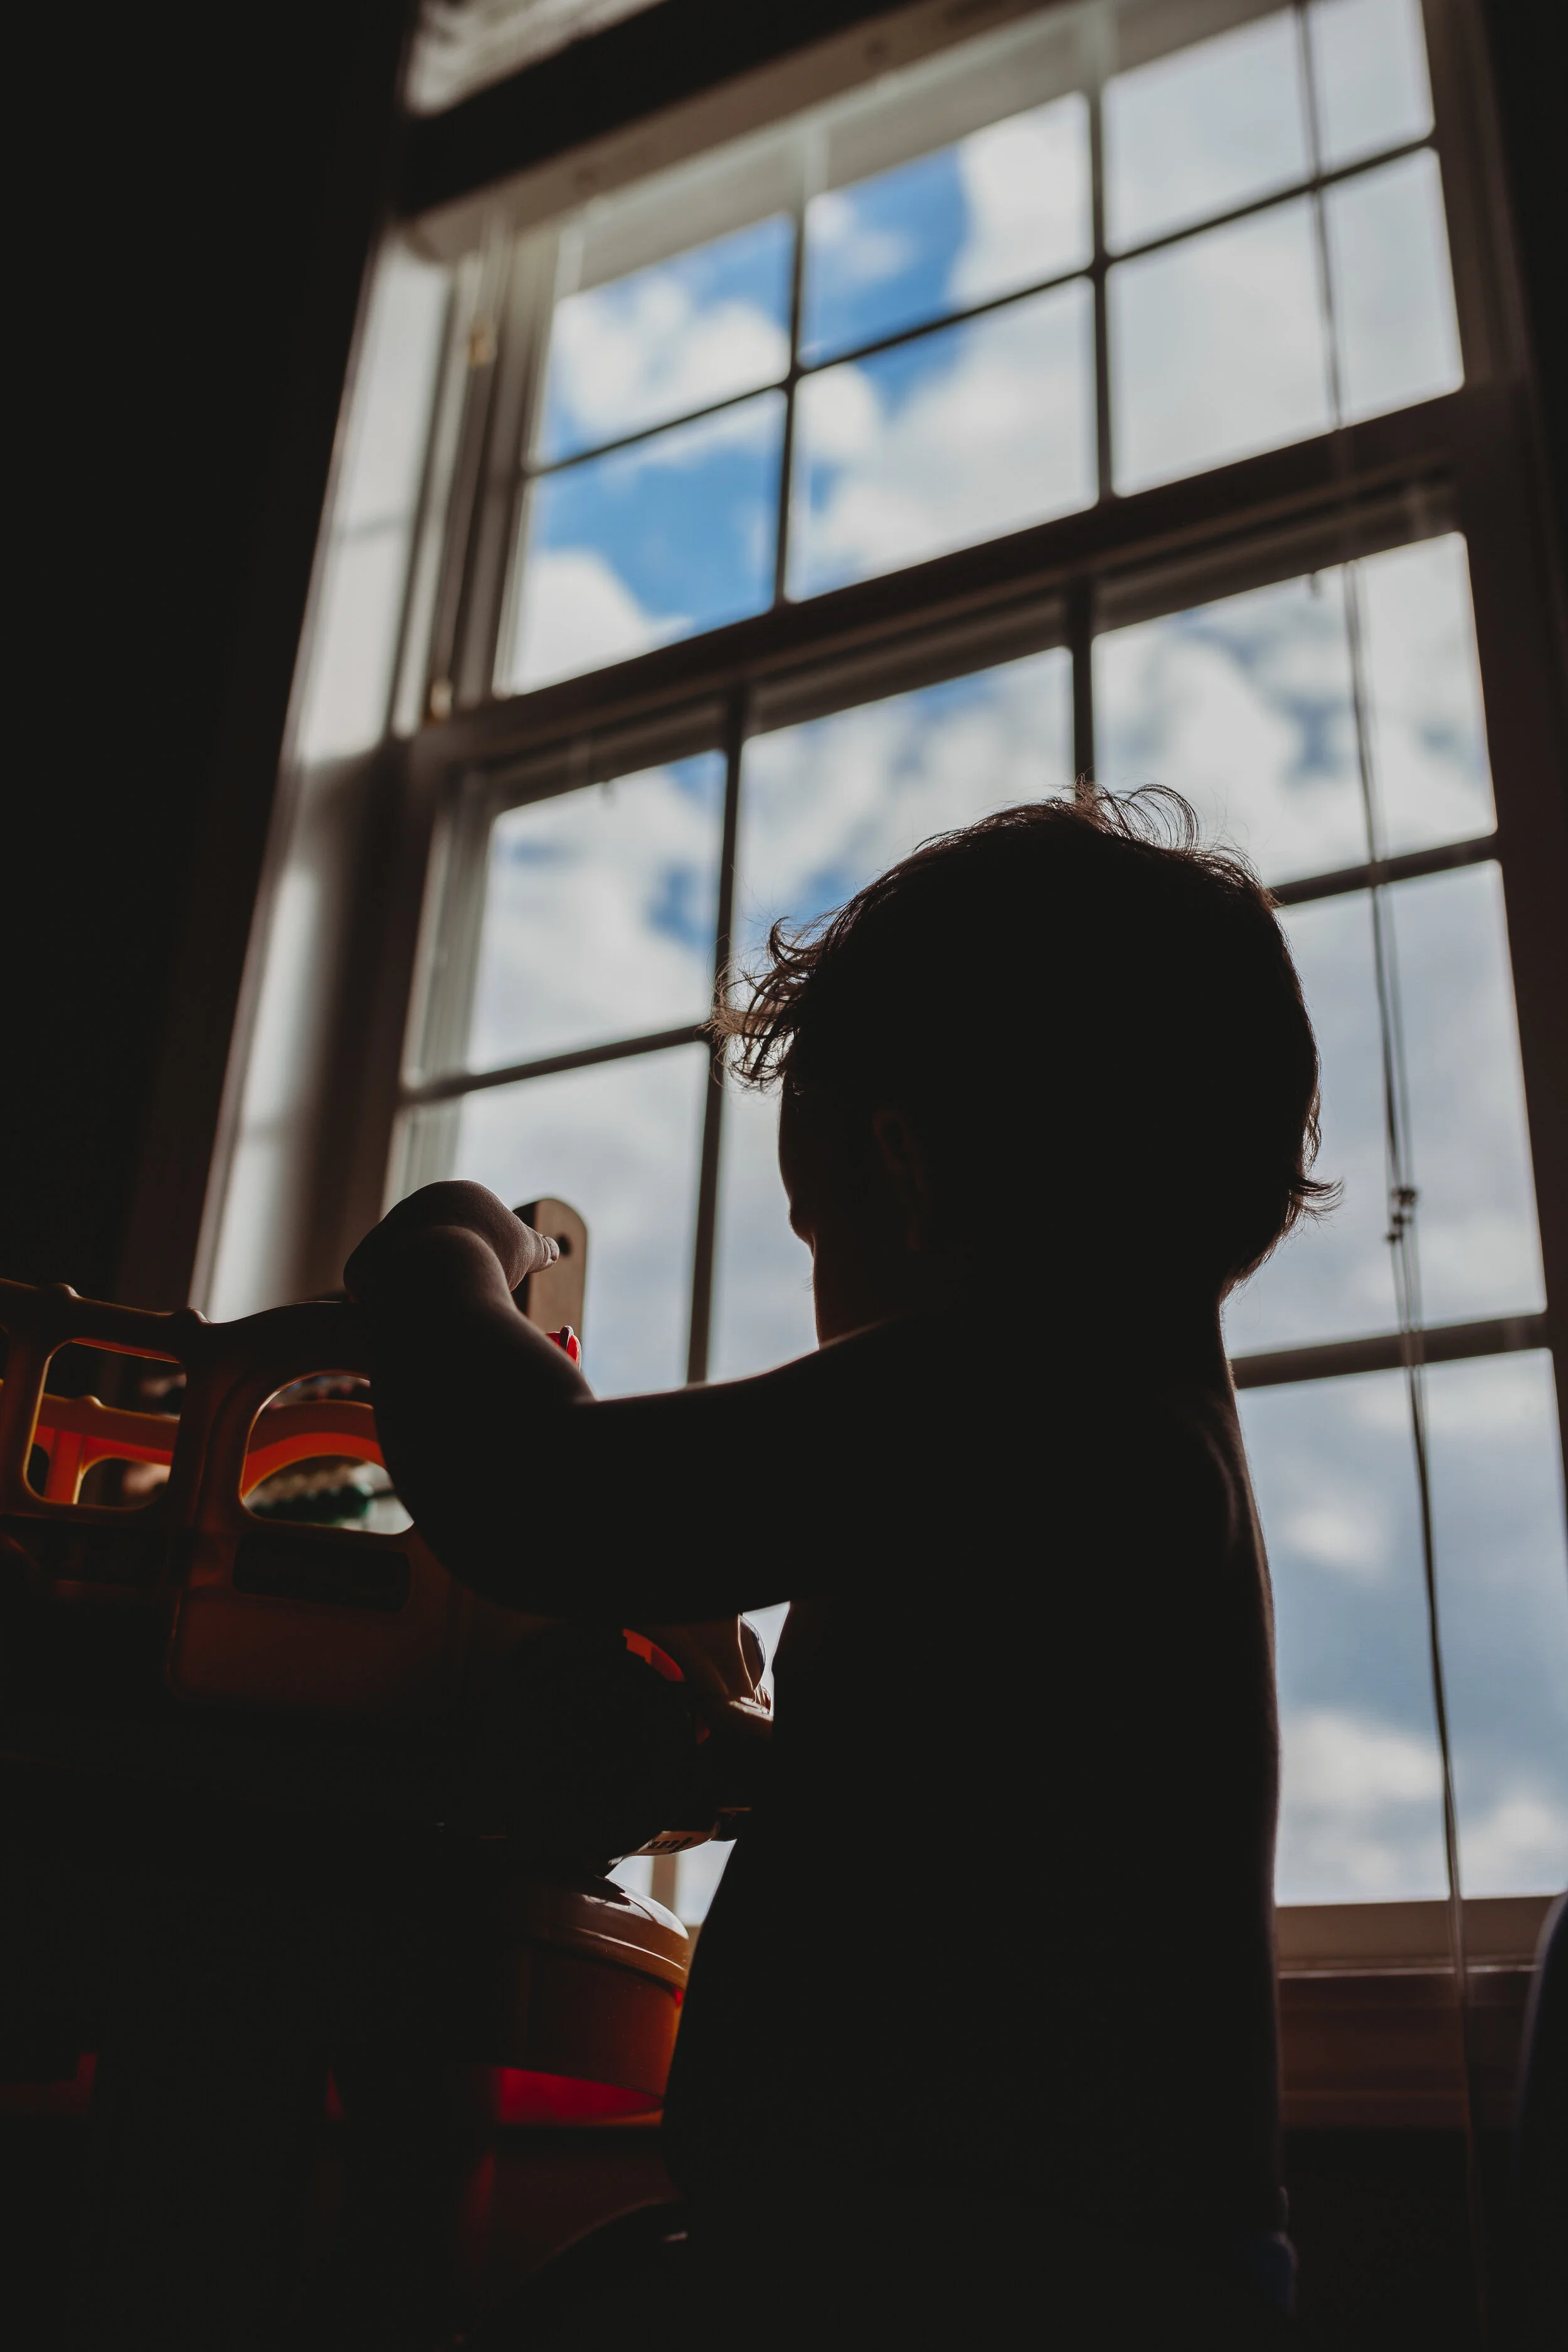
While documenting inside the home, I always look for little pockets of light. Window light is my absolute favorite to shoot. No other natural lighting source is as versatile. I love moody looks with heavy shadows and one way I achieve that is with window light, specifically using sidelight. You can also create soft portraits using window light. That is why I am so obsessed with window light! It is so versatile and guess what? It’s free! No need to spend money on fancy lights when you have constant light inside your home.

A few things to keep in mind about window light :
-Light is intense in the middle of the day. This makes contrast and shadows more pronounced giving a more dramatic look.
-Light is less intense early in the morning and early in the evening and with that you are able to create beautiful portrait photos.
-Having sheer curtains on the windows can help diffuse the light during hours where the light is intense which can help create a softer glow.
-Light color changes throughout the day. In the morning, light is cooler while in the afternoon it is warmer.
-Windows facing North and South will have more even and softer light.
-The closer you have your subject to the window, the brighter the subject will be.
-When using window light turn off all artificial light. This will prevent you from having yellow tones in the photo.
-Open the curtains, put up the blinds, and if you need to open the doors to get more light in, DO IT!
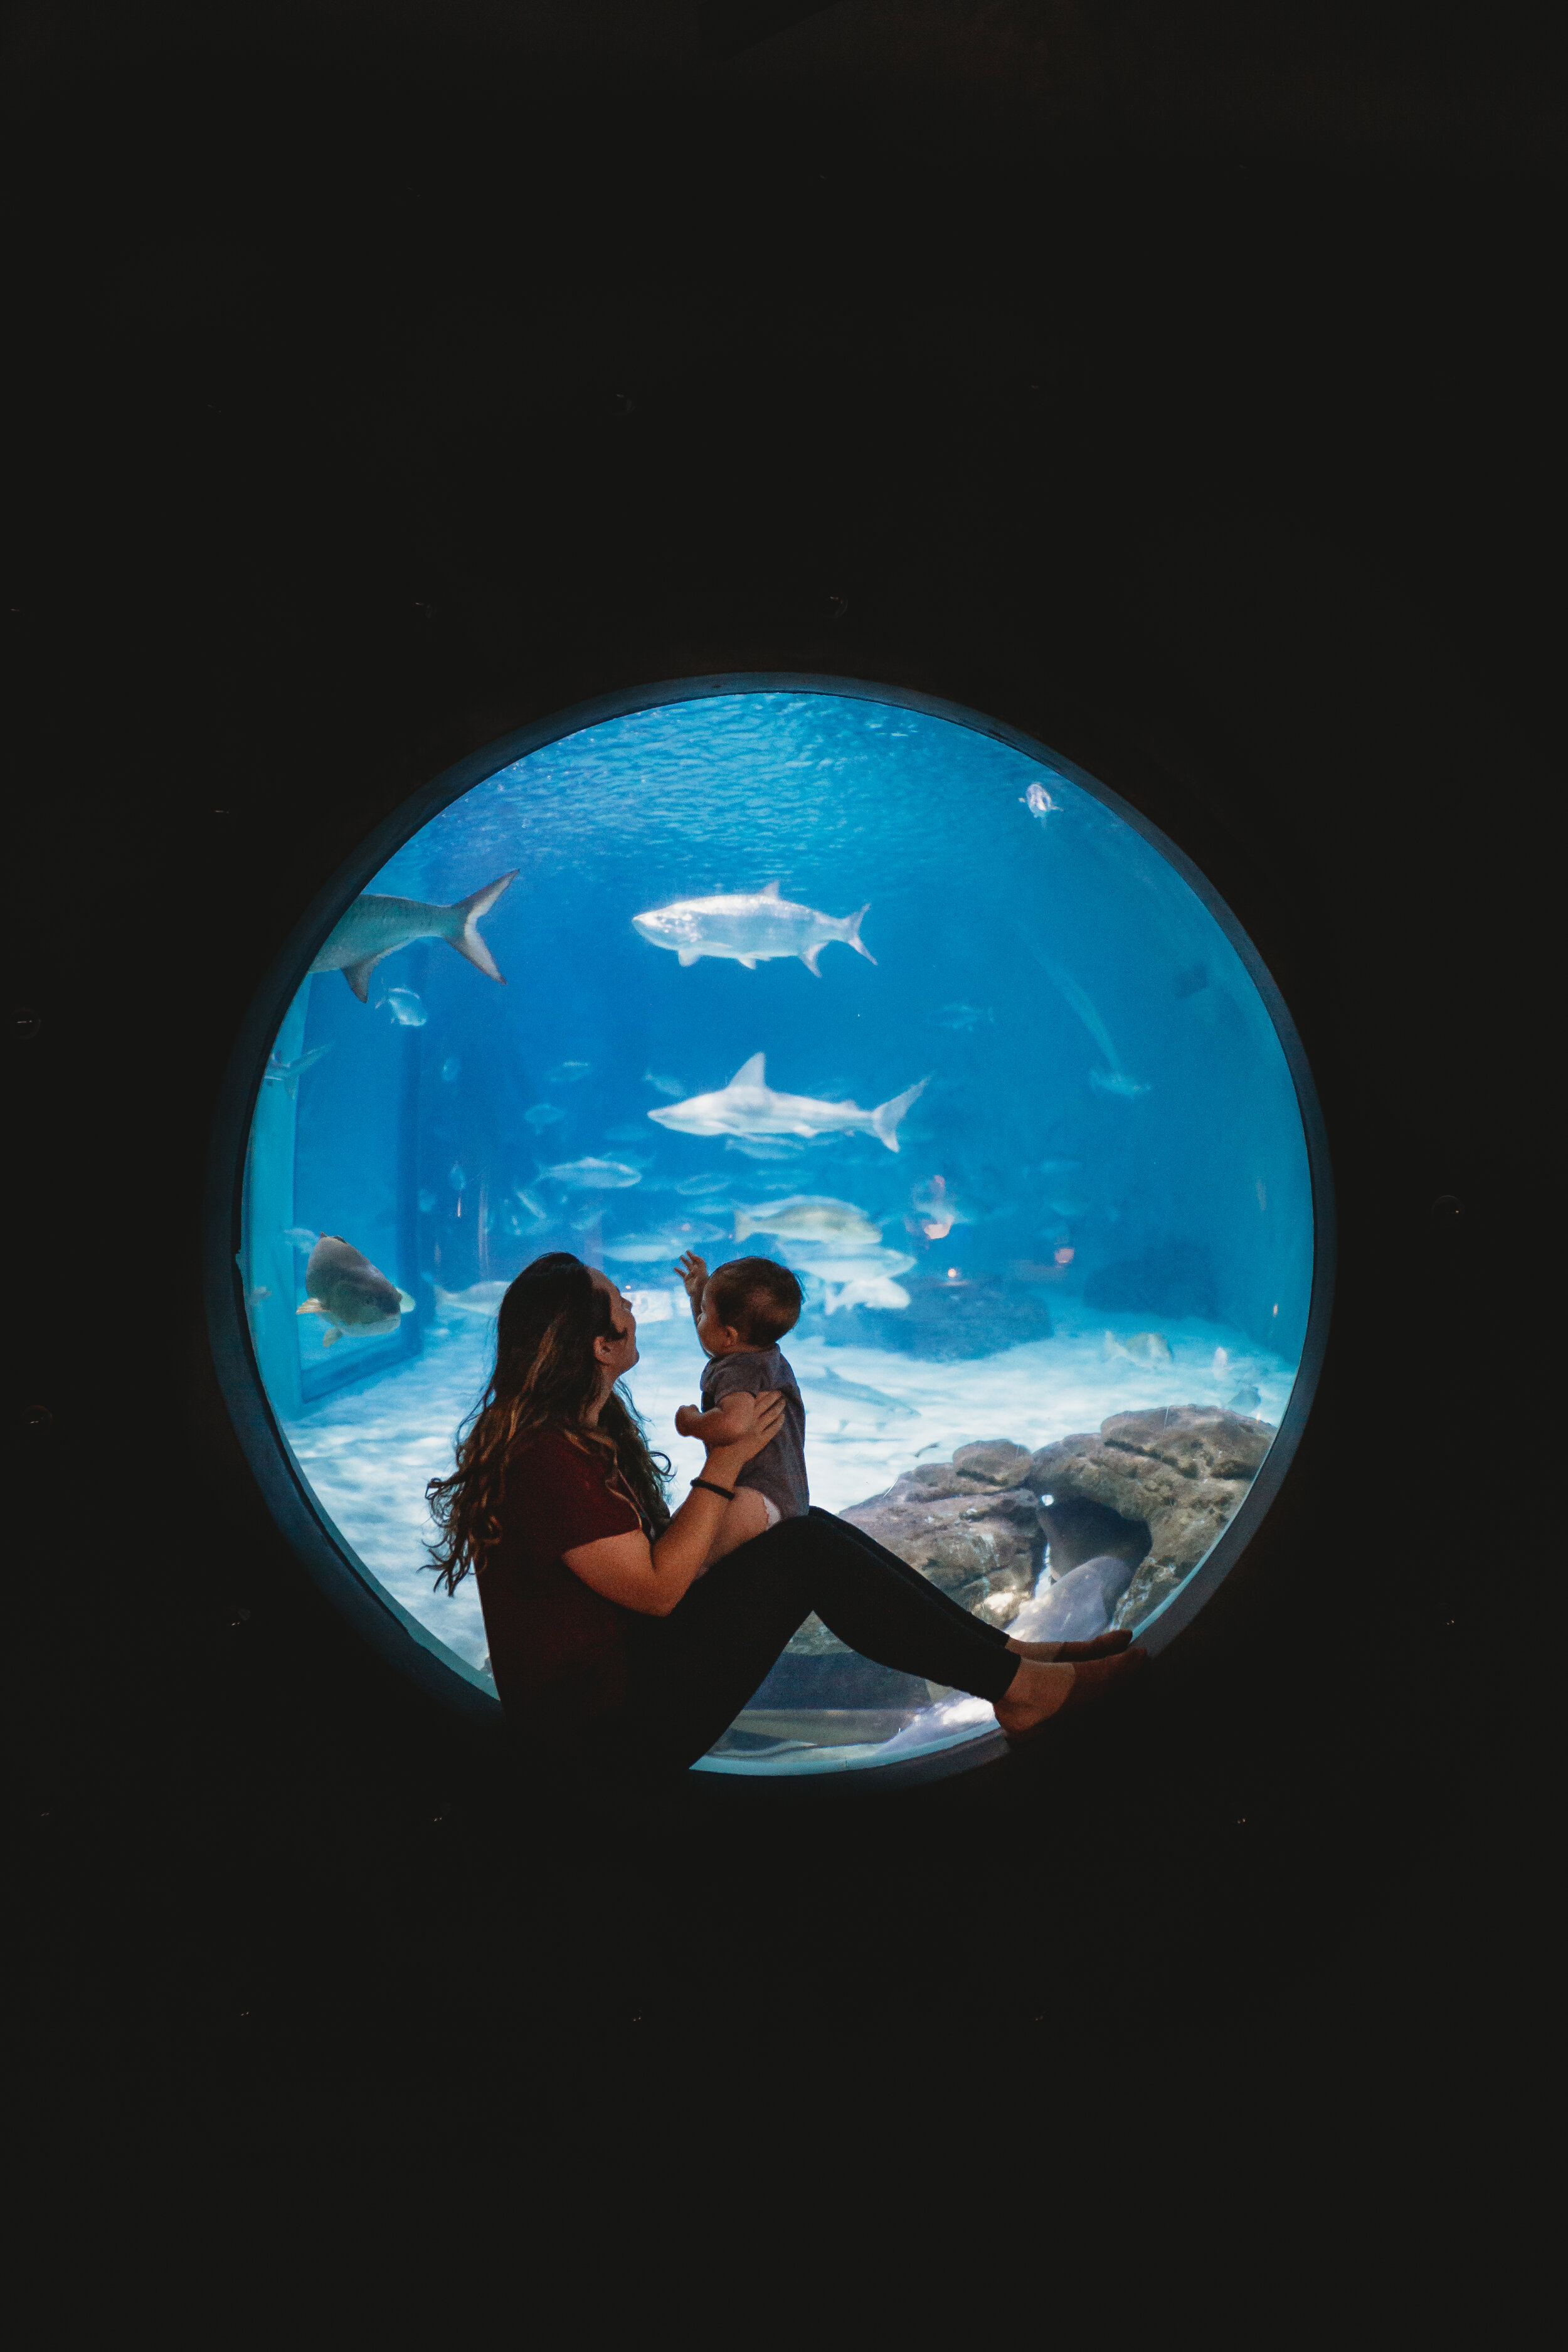
There are a few ways to use window light in photography. Sidelight, backlight and front light.

My favorite one to use is sidelight. Sidelight is the light coming in and hitting your subject from the side. With this type of light, you can create beautiful and powerful images. I tend to do lots of portraits with sidelight as it produces a lot of shadows. You can say I’m obsessed with shadows. When you are taking photos with sidelight, point the spot meter on the subject where light is the most pronounced, which is usually the side that is closest to the window. That way your subject will be exposed properly and the editing process will be a lot easier.
Here are some examples of how to use side lighting!


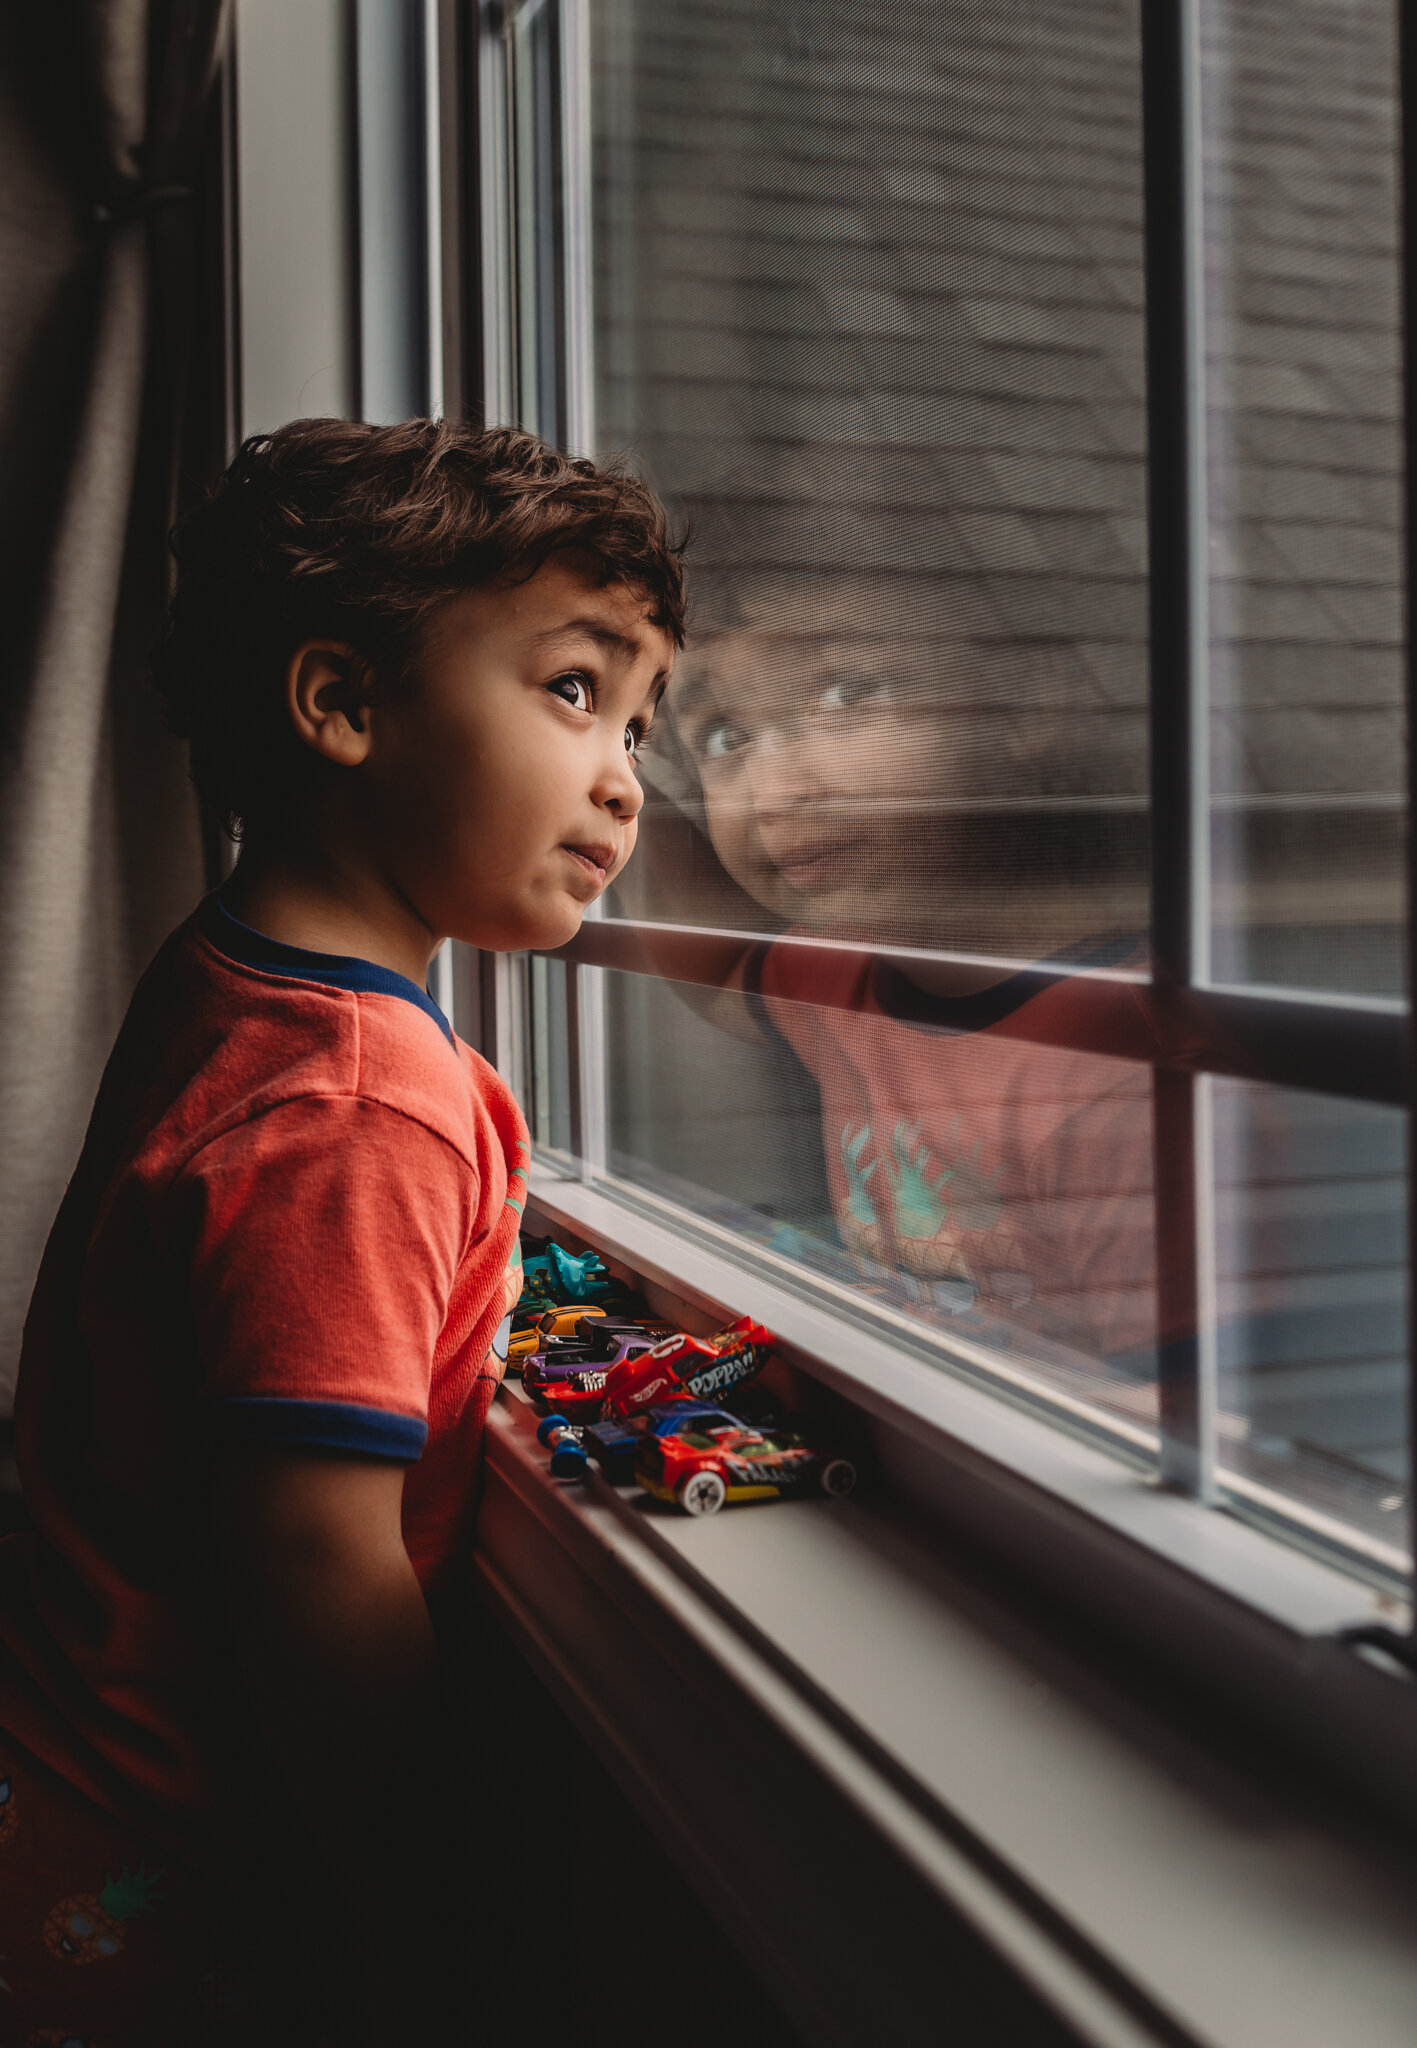
Front light is where you are standing between the window and your subject. By using the front light, you are able to produce a soft image with even light and not many shadows. Just be sure to be mindful of your own shadow.
Here are some examples of how to use front lighting!


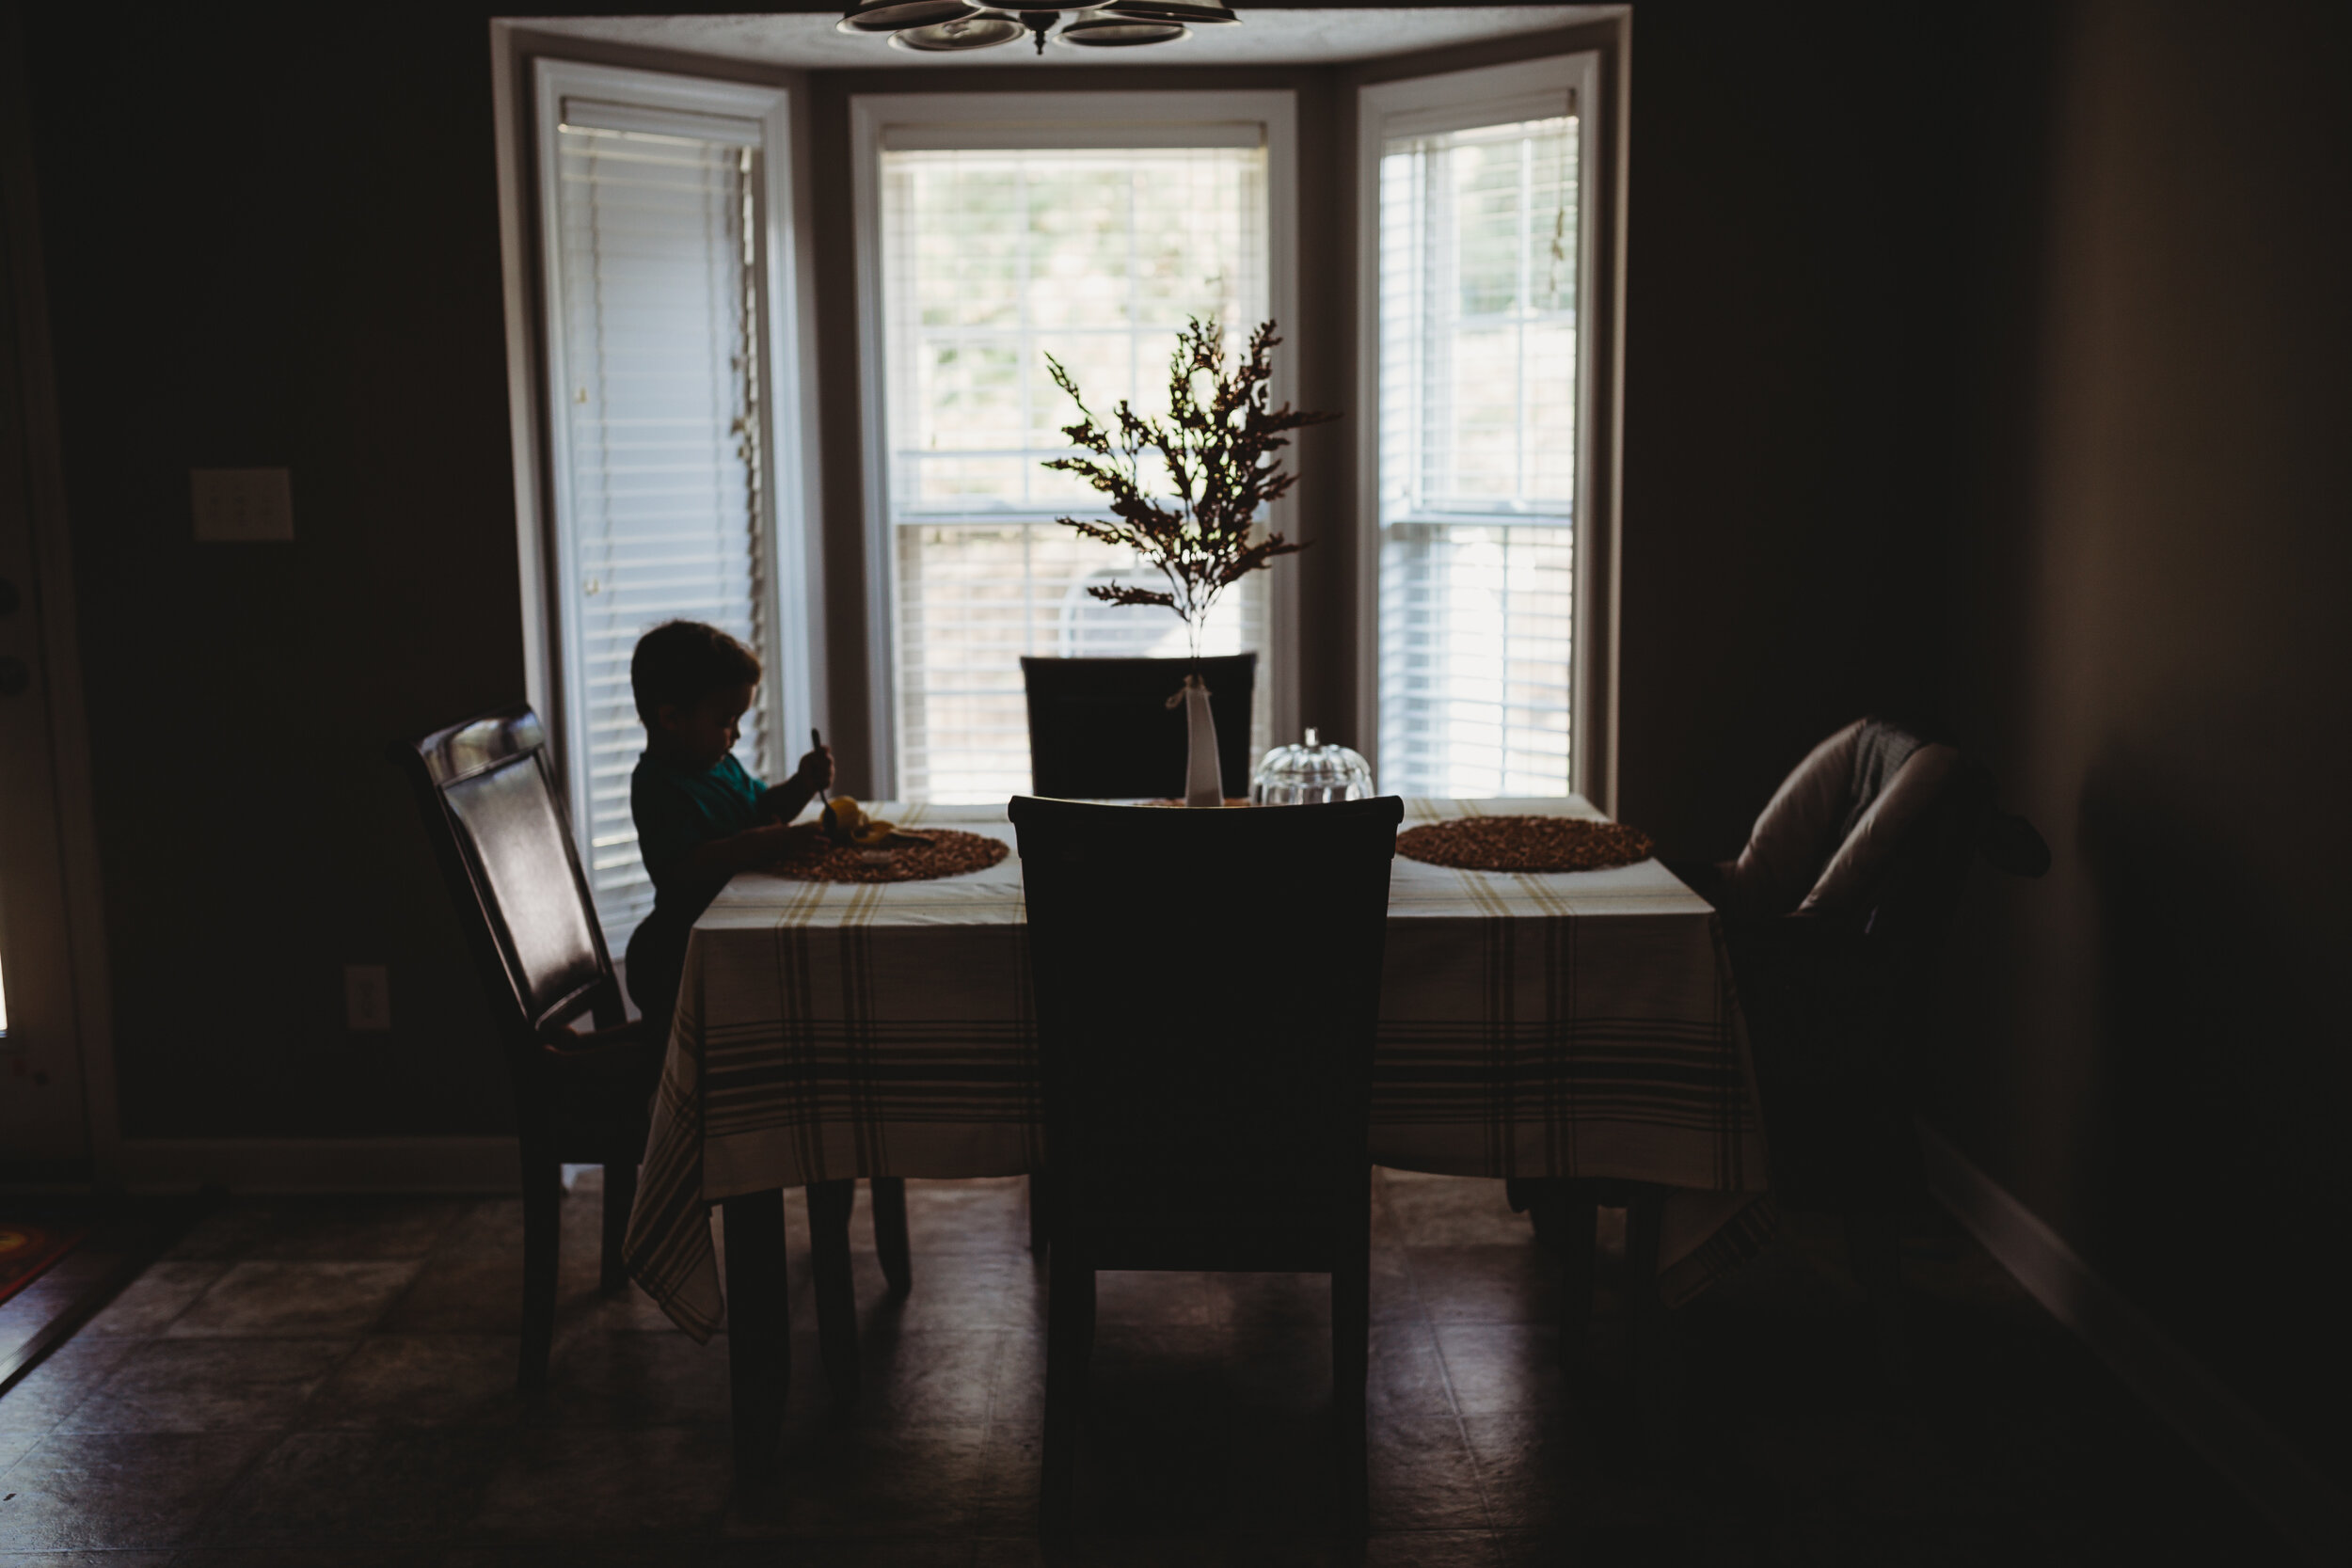
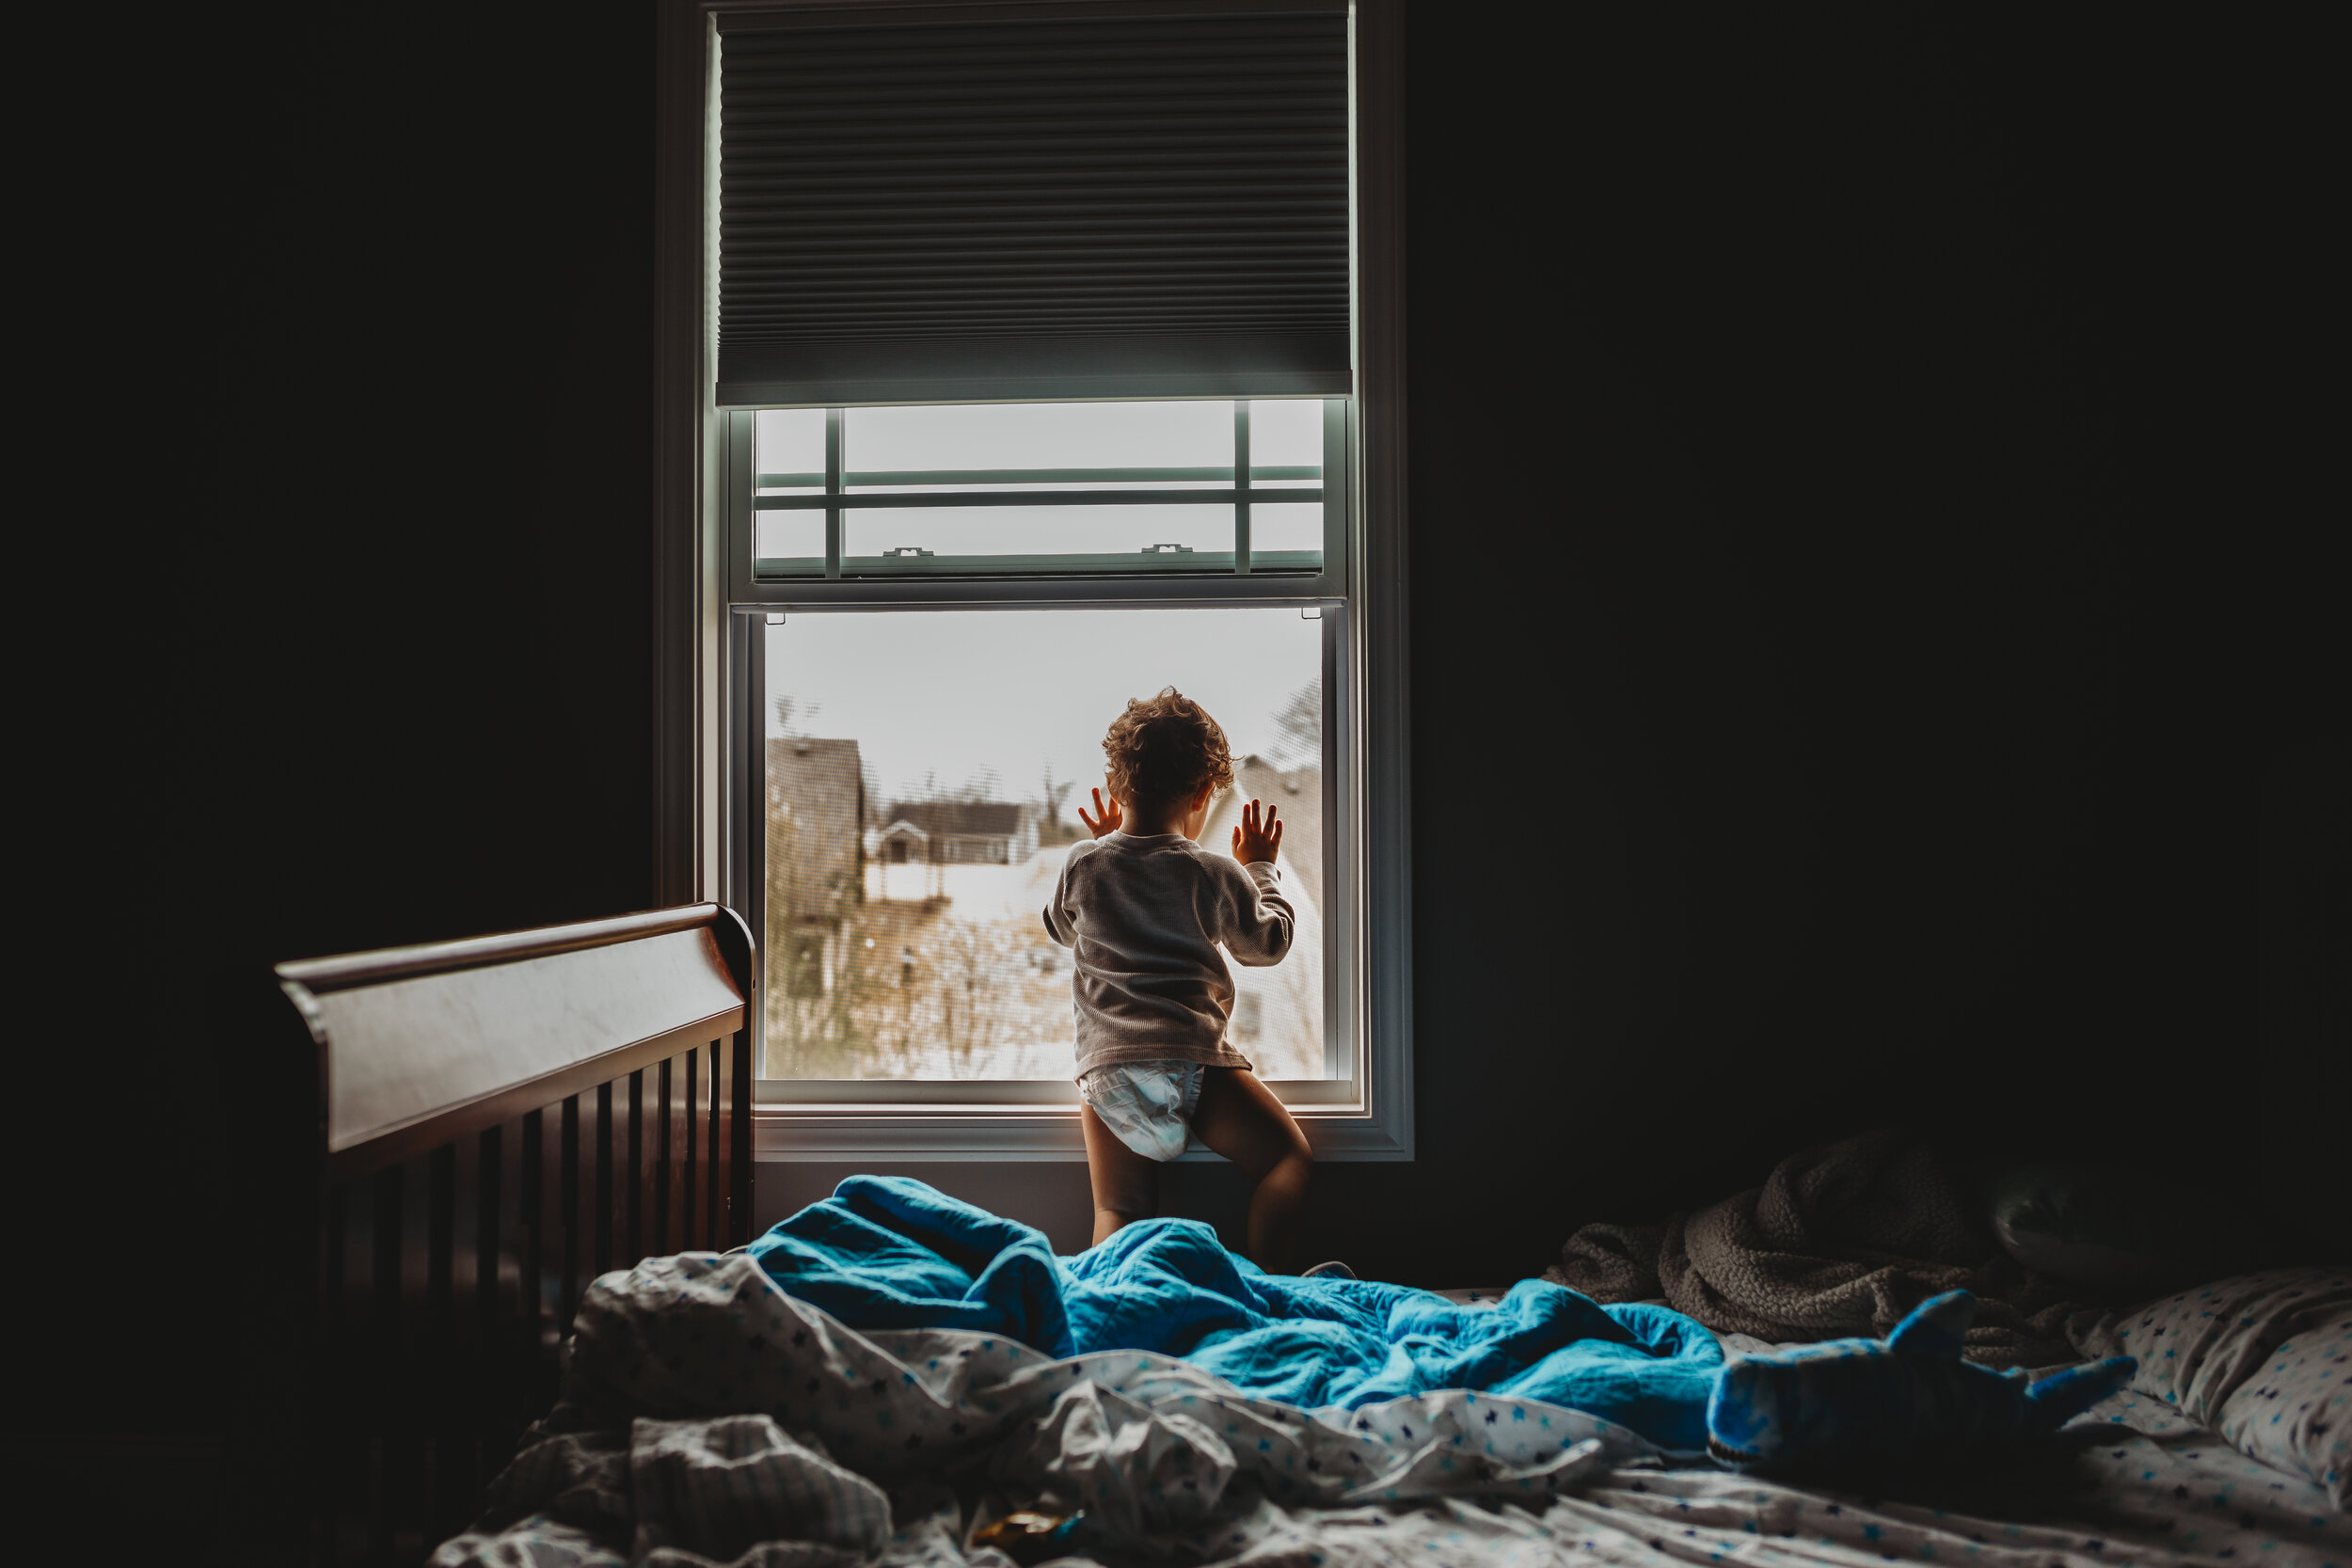
Backlight is where the subject is between the window and the camera. Keep in mind that aperture is very important with backlight. You can create beautiful silhouette photos with backlight.
Here are some examples of how to use back lighting!


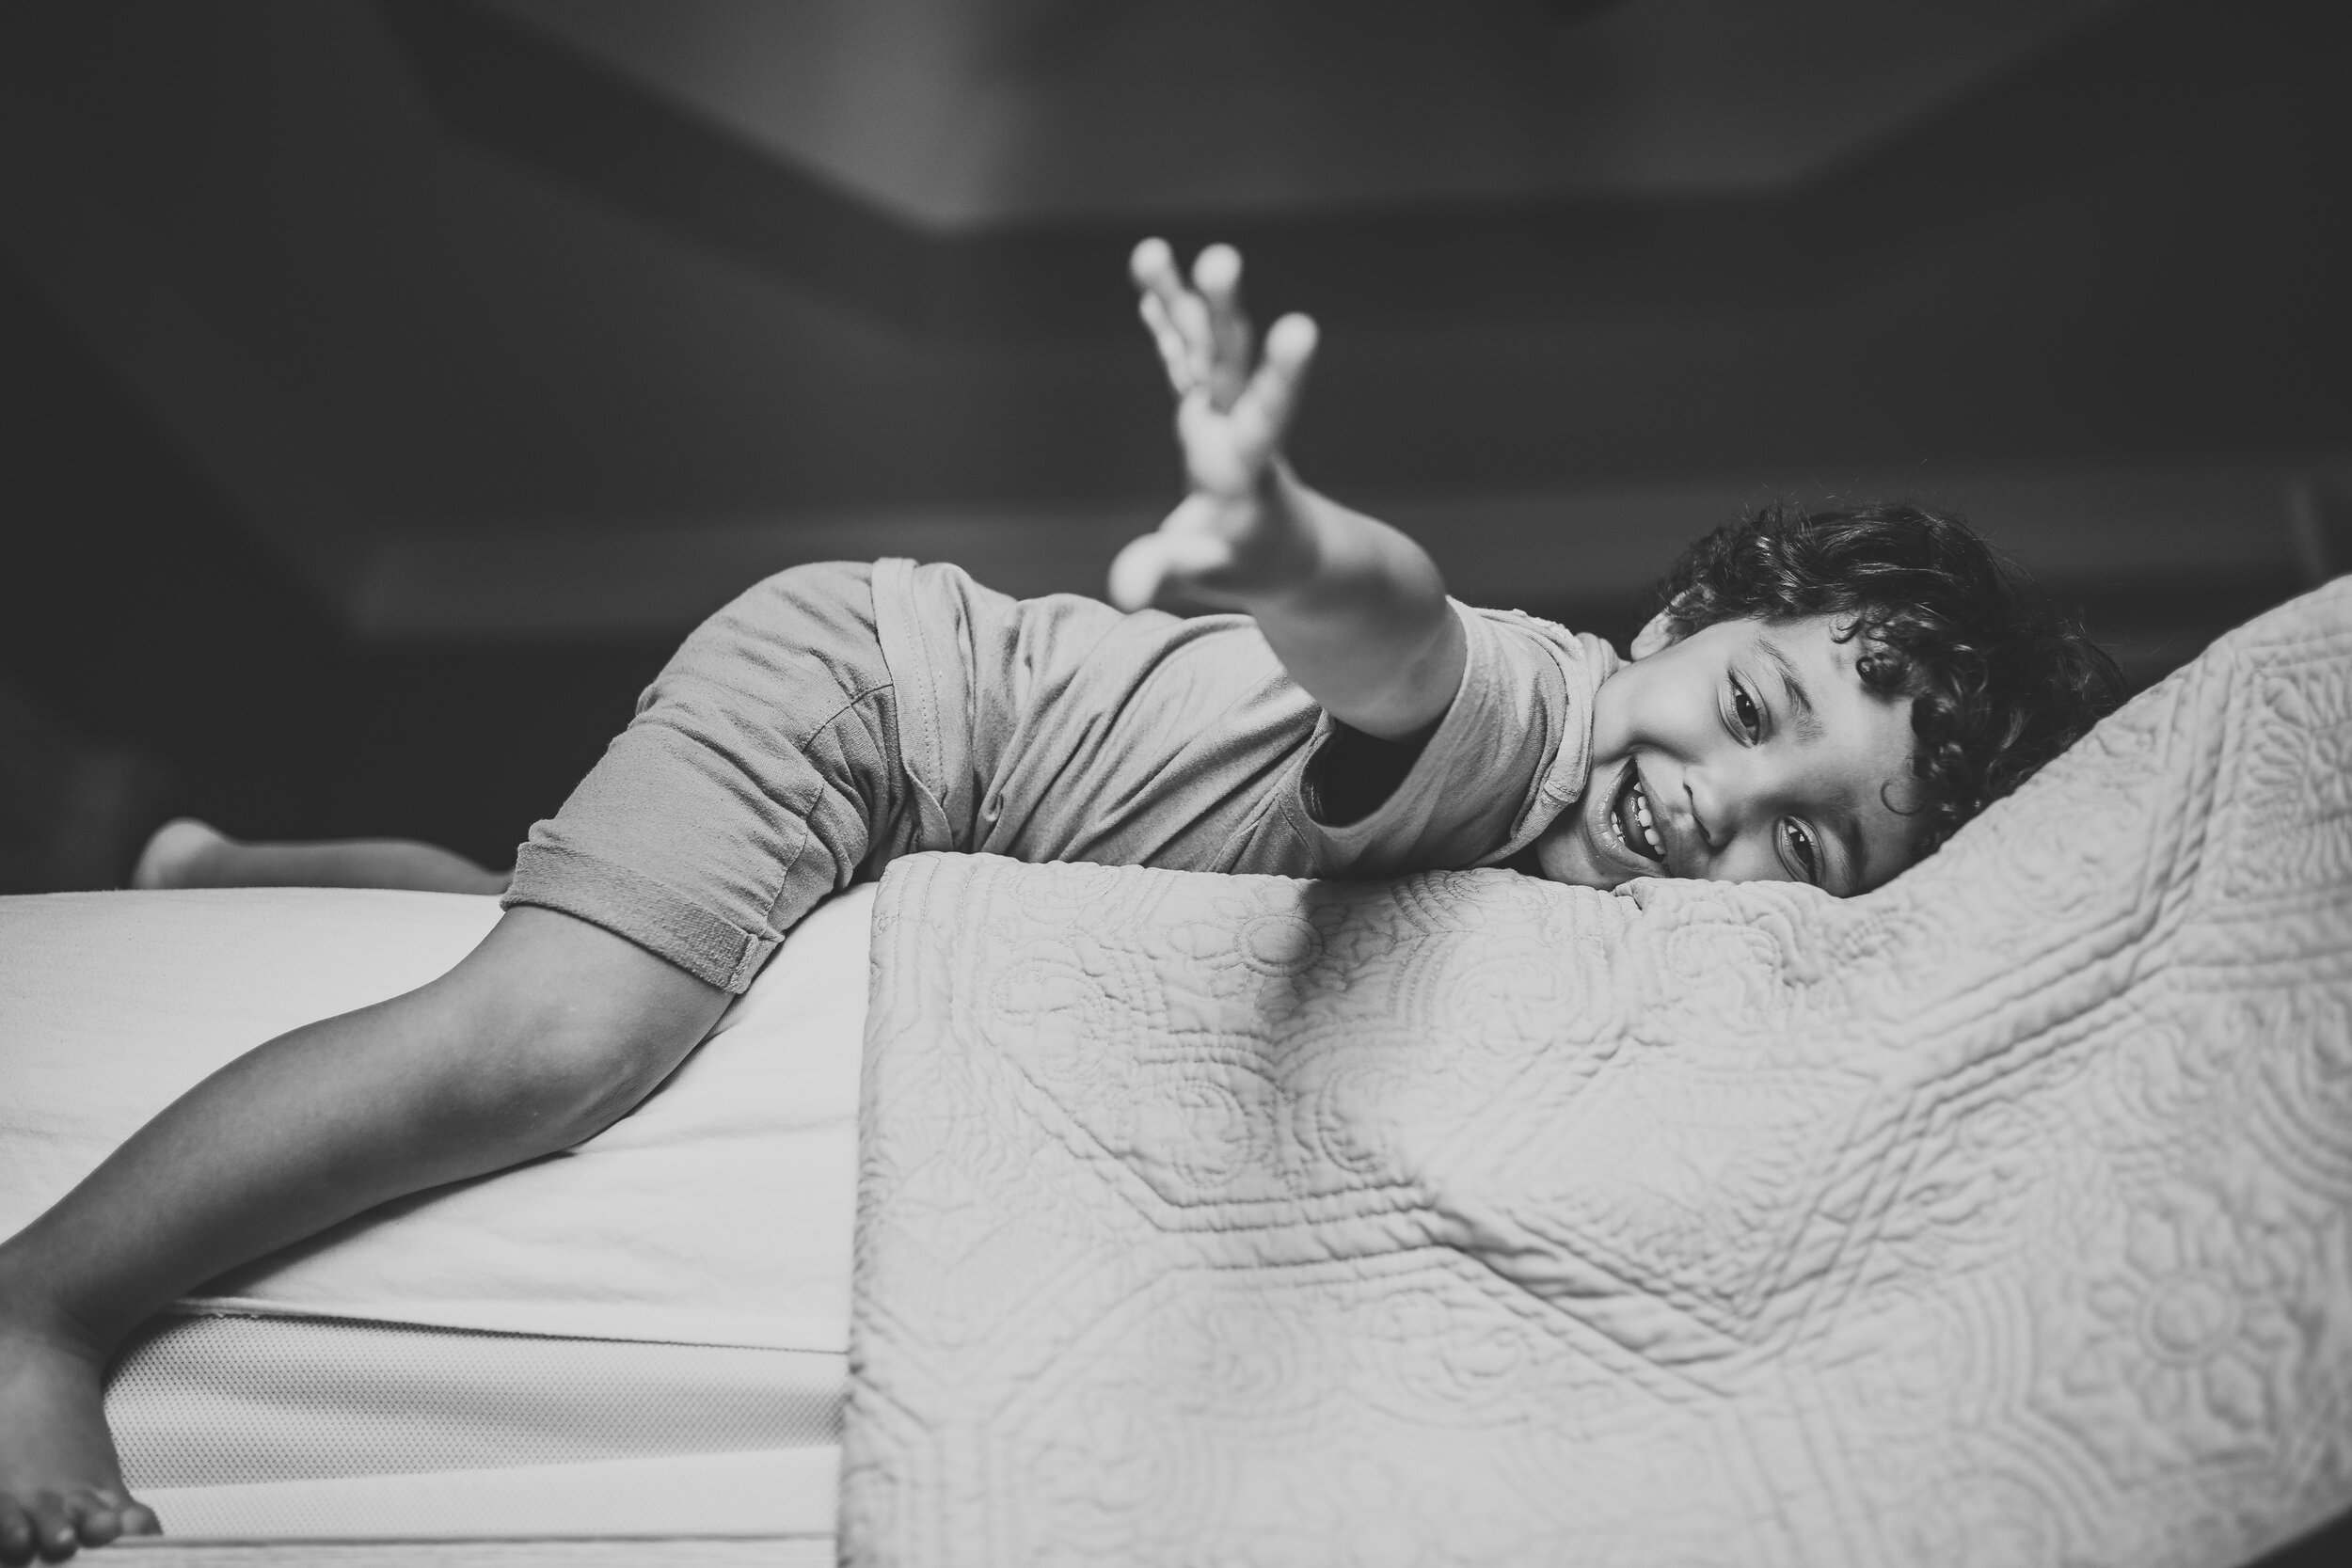
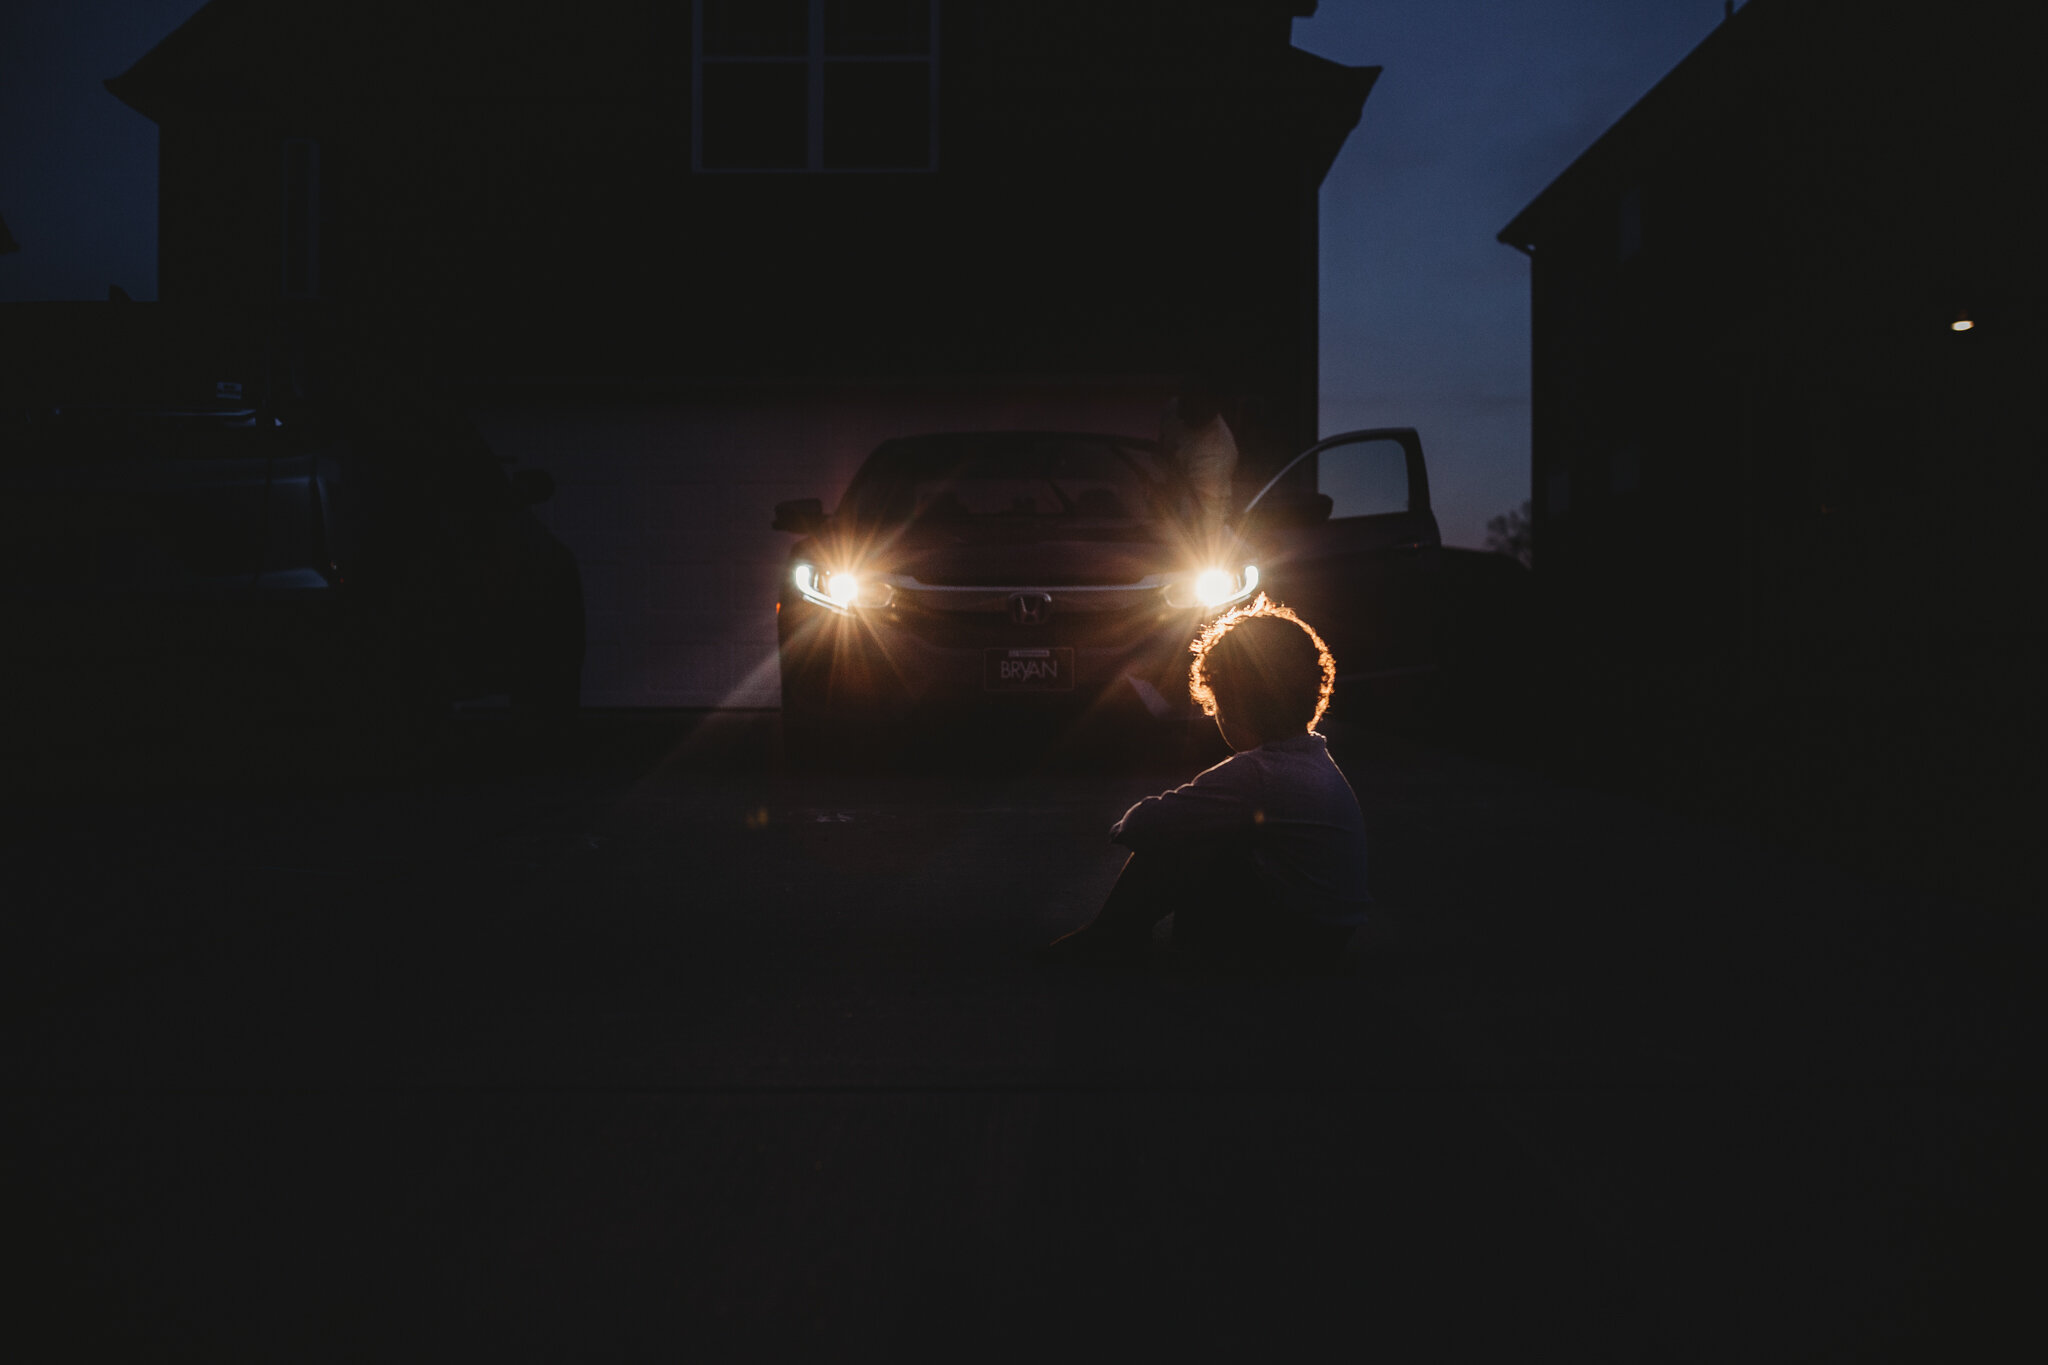
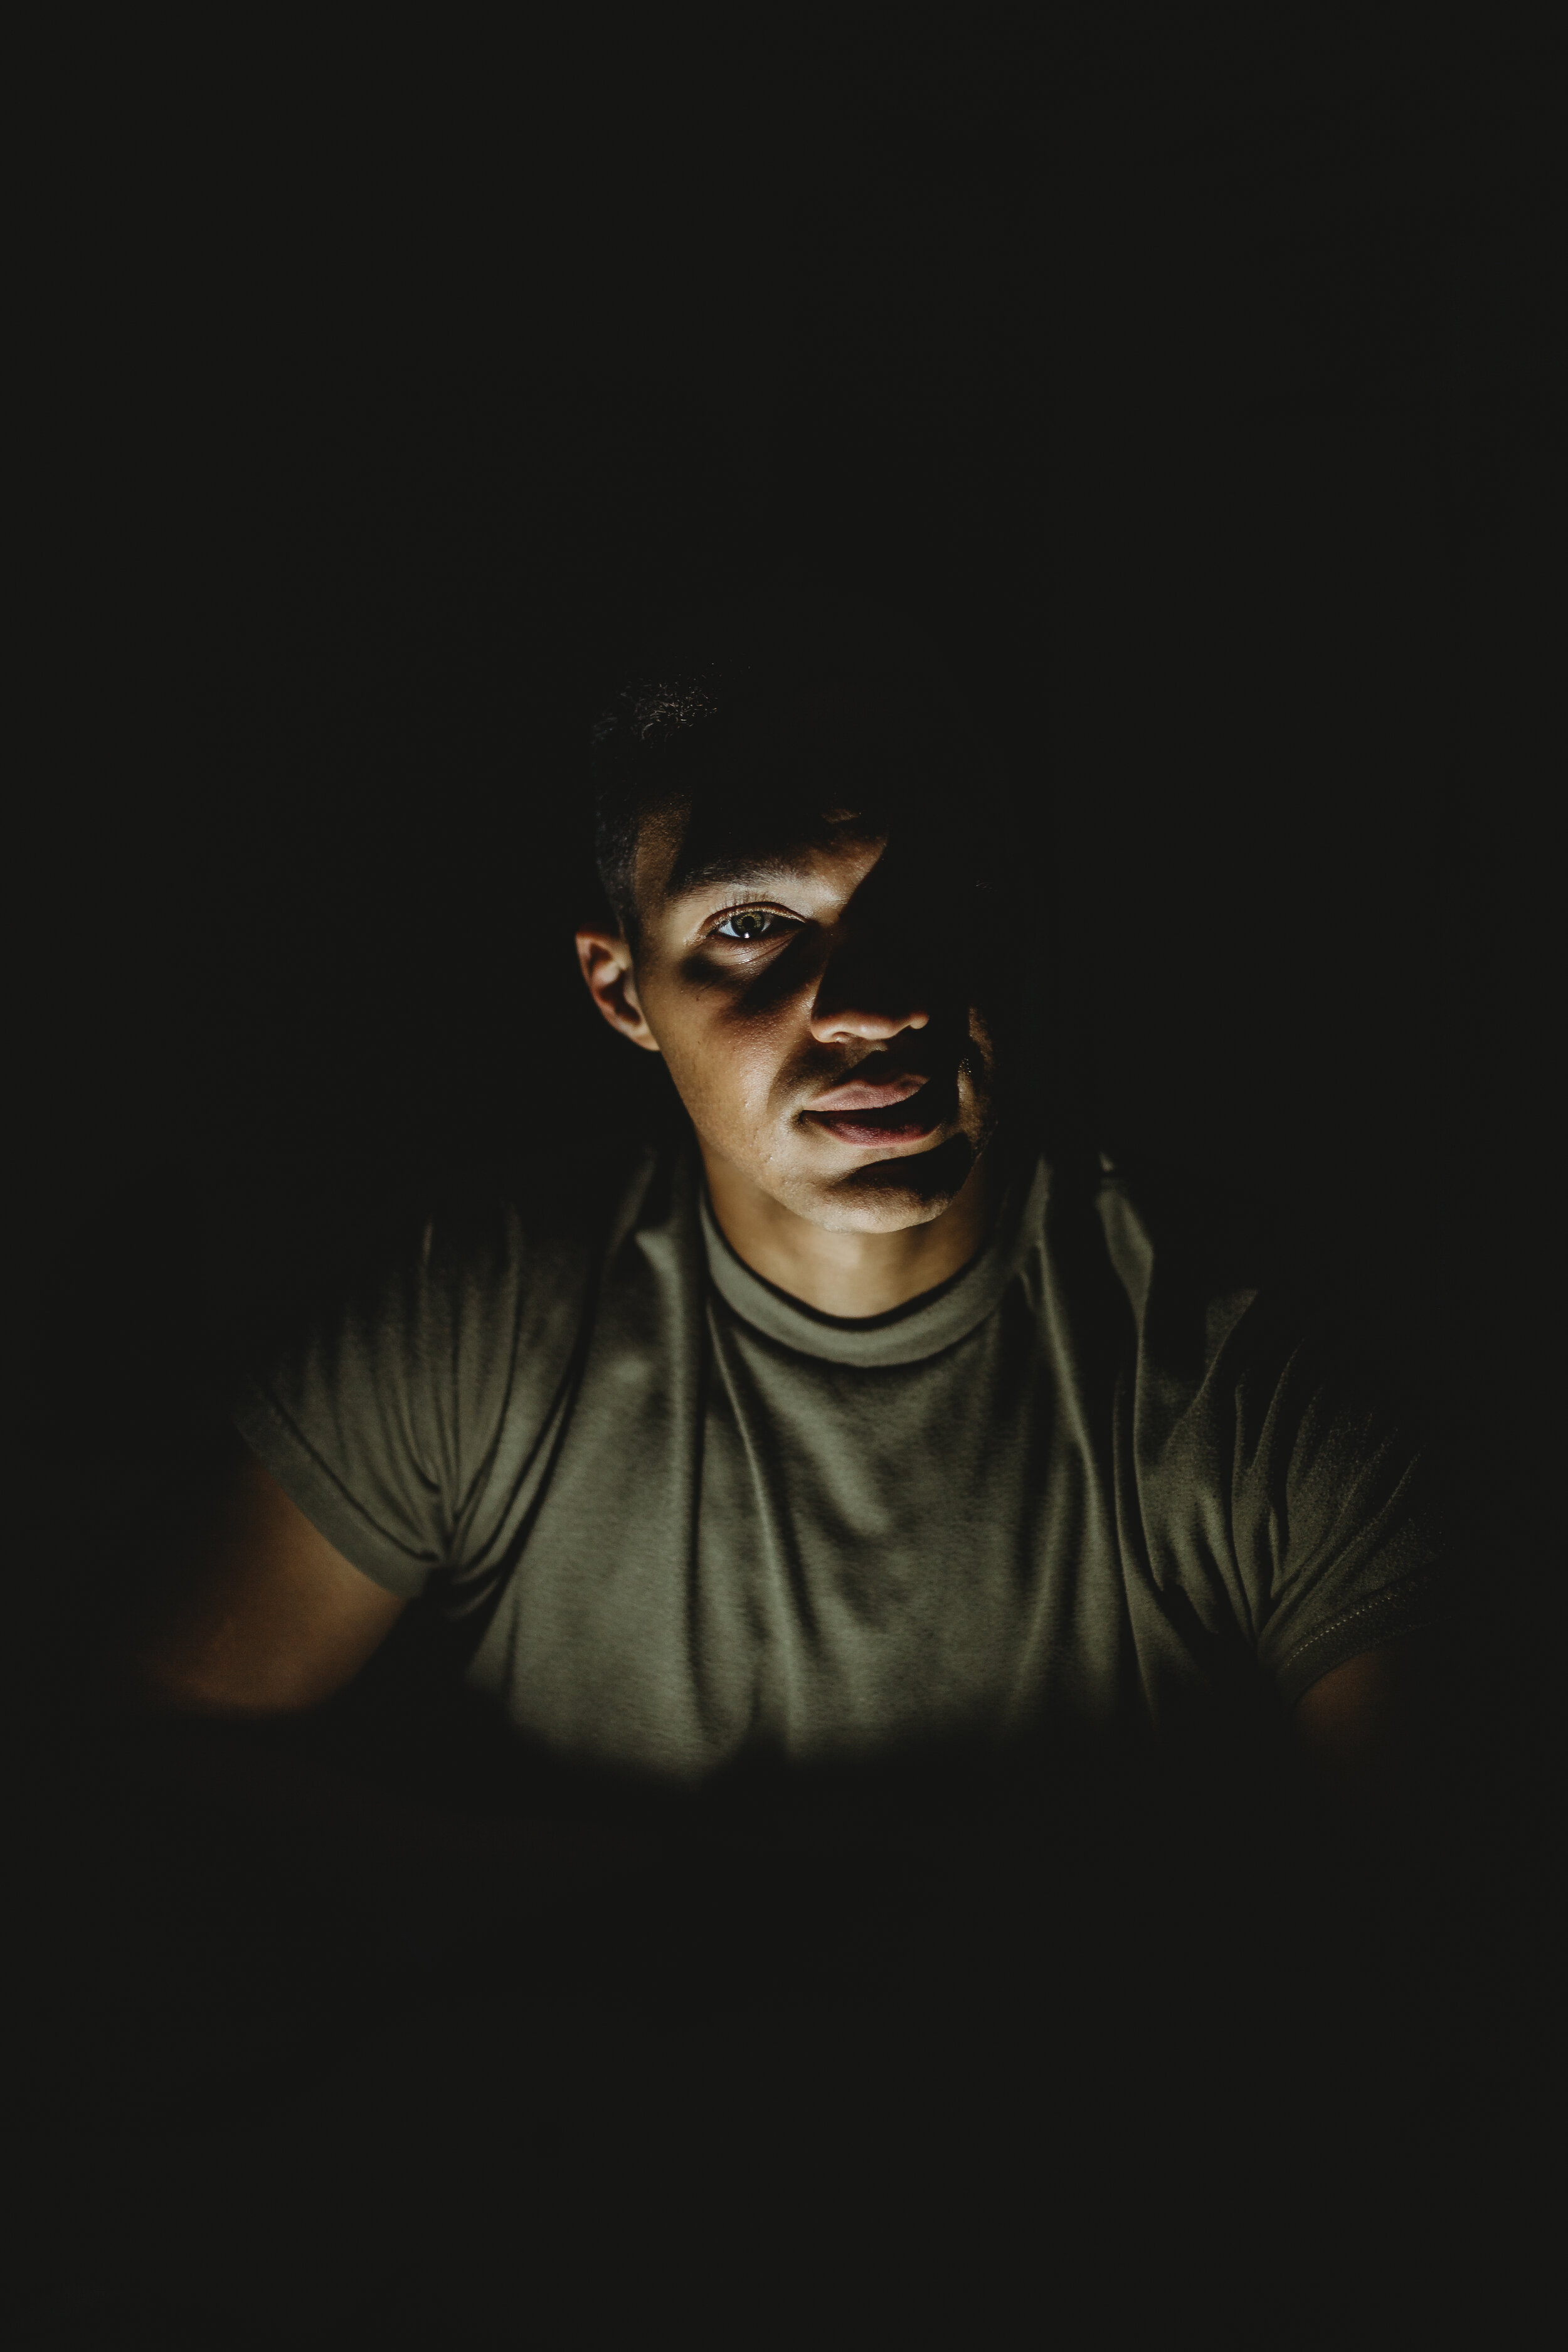
Now let’s talk a little bit about low light. Low light is dim light. I love looking for pockets of light inside the home or whenever we go somewhere. Your camera may have a hard time focusing in low light situations, so it’s important to focus on an area where light meets the dark. Low light situations provide shadows and contrast. Shadows and contrast are my best friends. Shadows can add drama to your photos which is great for storytelling. With low light, you may find yourself wanting to use artificial light.
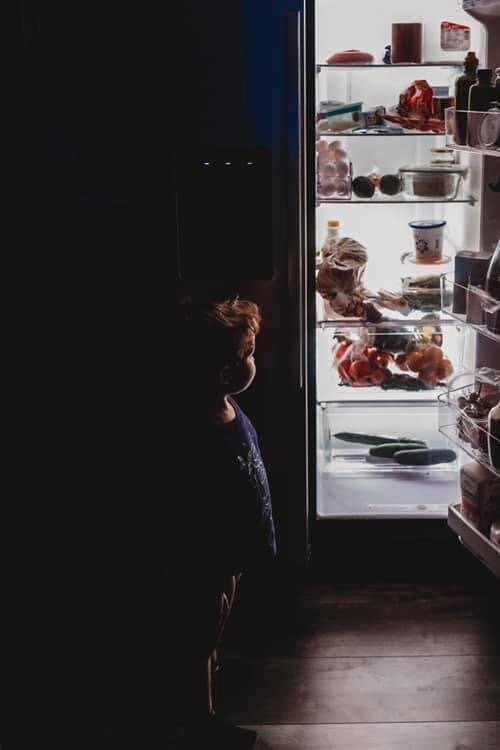
There will be a time where you will have to photograph without any natural light. I do have a flash that I use every once in a while but don’t feel like you need to go out and spend money on a flash. You can always use things already available to you. Look around, your home is full of light resources. If you start paying attention, you will notice the light on your phone, TV light, flashlights, and many more. I even used the light from my refrigerator to capture a sweet moment of my son. One thing to remember here is to adjust your white balance as artificial light can add yellow/green hues to your subject. And if you forget to do that in-camera, that’s ok you can change your WB during the editing process. Note from Julie here friends— we will cover this in the editing part, which is last! For now, just leave your camera in AUTO WHITE BALANCE as you’re learning!
With low light, you will have to have your ISO up higher but don’t be afraid to add grain to your photos. It’s about the moment you are capturing and no one will look at your photos and say "wow look at all that grain!"
Here are some examples of using artificial and low lighting!

It’s important to keep track of the light inside your home; you can even keep a diary of how light changes in every room throughout the day. Take a note of the light on a sunny day vs cloudy day. Write down which rooms have the best light at different times of day. This is very important.
Lastly, I want to say, love the imperfections. Shooting indoors comes with challenges but don’t worry too much about getting the best light as it is all about the moment you are trying to preserve. If it brings you joy, I call that a win.“Light makes photography. Embrace light. Admire it. Love it. But above all, know light. Know it for all you are worth, and you will know the key to photography.” George Eastman
PHEW! That was a LOT huh? But hopefully now you can understand the different types of light, what to look for with “good” lighting, and how to use the different types to be inspired and create different types of photos.
Friends, again it’s now YOUR turn to practice:
Experiment with light! Learn the lighting in your own house using Lola’s guidance.
Try shooting outside at all different times of day and with different weather! Experiment on cloudy days, with shade, with bright and harsh sun, and if you can, get out during golden hour.
If you’ve got questions or just want to shout out that you’re following along and on this journey, drop a comment below or send me a DM on Instagram! I can’t wait to see what y’all learn from this series and hope you’re inspired by lighting too!