So you've got a camera you don't know how to use? Part 3 [Savannah Photography Mentor]
Hi friends! Welcome back! I hope you found parts one and two on how to use your camera in manual mode and all about lighting helpful! You can always refer back to that at any time— the link for part one is right here and part two is right here.
A few things I want to recap before jumping into the next lesson—
I decided to combine composition and focus into one lesson, here, so the series is now a five part one instead of six. Yay!
Everything I cover and show here about focus points is going to be specific to Canon, however, the principles are the same no matter what brand of camera you are using!
I answered questions from y’all over on my instagram! Go check it out here! (It’s under the highlight tab of photog tips!)
As a reminder, each block of instruction I’ll have a blog post like this one here, as well as videos in the post (like the one below), to teach you the basics. You can either just watch the videos first (if you’d like to just have them all in one place, you can click here for the entire playlist) and then read everything, or break it up into your own pace/chunks. And, if at the end of each lesson, you find that you have any questions, you can comment below on this blog post, or message me on social media! Be sure to follow along there as I will go live after each lesson in order to try and help you learn even more! 🙌🏻
OK! Now on to composition!
So first things first— what the heck am I talking about when I say composition? This article below explains composition in photography, and to not reinvent the wheel, here’s what it says:
First and foremost, “composition” describes placement of relative objects and elements in a work of art. Consequently, composition is a key aspect of a good work of art.
Simply put, composing an image means arranging elements within it in a way that suits the core idea or goal of your work best. Arranging elements can be done by actually moving the objects or subjects.
(Quote above taken from What is Composition in Photography?; which I highly recommend checking out!).
Everything we’ve learned in previous lessons will come into play here and affect your photo’s composition. Composition in my eyes, is what’s going to make your photo more interesting and visually appealing (and therefore, way better with some easy adjustments).
So how do we compose an image?
“There are no rules for good photographs, only good photographs.” —Ansel Adams
So Ansel Adams was right, 100%. There are a LOT of different techniques and “rules” of how to compose your image, but, the bottom line up front is this: there are no rules. You compose the way you see fit. This is where I’ll add in a part about “having the eye for it.” You probably have heard others say something like “oh he/she has the eye for photography,” and I definitely agree with this statement. Some people just naturally have “the gift” of knowing how to take a good photograph. BUT. There is STILL HOPE for the people that don’t naturally have the same gift, and composition and having a better eye can be trained! When I first started out, I understood the concept of the rule of thirds, and leading lines and not much else. I struggled with composition, and while my brain knew what I wanted to create with my photos, I had to REALLY work to train my eye to be better at composing and therefore better at taking more interesting photos. When you really stop and think about things, photography is art. Art is subjective. Nothing is right or wrong with the art you create. But there is a way to get better through deliberate practice and using techniques I’ll describe!
OK. So, that all being said I’m going to touch on the following in the video:
The Rule of Thirds
Using Lines
Framing
Negative Spaces
Other Composition Techniques
I recommend checking out ALL of these articles below to UP your composition game!
Beginner’s Guide to Photography Composition
I don’t want to write a huge novel, as composition is just something you off the bat have the knack for, or is something you practice to get better at. So I’m going to instead show some examples and talk more in depth about the different techniques in my video!
The Rule of Thirds
So I mentioned there's a number of rules, but it often just comes down to what naturally looks and feels right to you. The rule of thirds is one that's been around for a long time. And the idea here is that we break the scene up into thirds, left, right, top, middle, and bottom. And where those intersections are, and where the lines are, are good places to put your subject. Now you can put your subject in the middle, but it can seem a little bit static and boring, so by moving it off to one of these other areas, it might make it a more interesting photograph. This doesn't have to be exactly where the crosshairs are, it's just get your subject out of the center of the frame to make things a little bit more interesting. Does this mean you can’t put things in the middle of the frame? Absolutely not! But it will make it more interesting if you try to place your subjects at those intersection using the rule of thirds.
Resources:

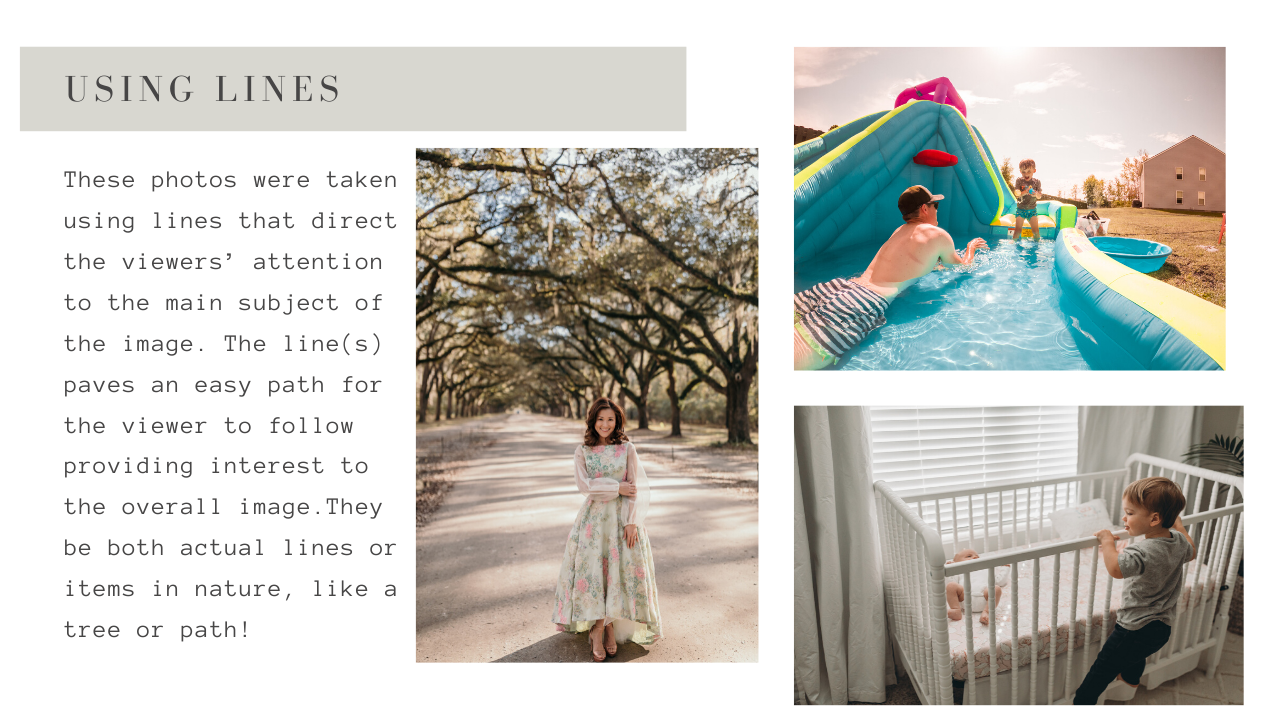
Using Leading Lines
You can use lines that direct the viewers’ attention to the main subject of the image. The line(s) paves an easy path for the viewer to follow providing interest to the overall image while offering a clear and concise compositional choice from the photographer. The lines can be actual lines, or lines formed by nature that draw your eye to the subject of your photograph.
Resources:
How to Use Leading Lines for Better Photos
Define Leading Lines in Photography
Framing
Framing refers to using elements of a scene to create a frame within your frame. For example, you might shoot through a doorway, pulled back curtains, branches, fences, tunnels, or arches to highlight your subject. Adding a focal point through framing shows a viewer exactly where to look.
Resources:

Negative Space
Negative space is the area surrounding the main subject in a photograph which is left unoccupied. Put simply, it is the space around the object itself that helps define the positive space (or main focus).
Resources:
Negative Space: Step Back and Give Your Subject Some Space
Negative Space for Photographers

Other Composition Techniques
In addition to the above techniques, there are plenty more like filling the frame, symmetry, the golden ratio, golden triangles, color, layering and more! I’m not going to share examples or talk a lot about all of this, just know there are TONS of different ways to compose a photo, and like stated above, there’s not a set and hard rule to this, so do what you like best!
Resources:
Part Two: Focus
So focusing is obviously SUPER important! In previous lessons I told you to default to what your camera will automatically do as you learned how to take photos in manual mode. Now that you’ve done that, it’s time to switch up how you choose your focus! Each camera will have it’s own focus point selection options. So now it is the time to dig up or google your instruction manual for YOUR camera because what I’ll show will be specific to mine and will likely look different for you based on your brand and model!
OK, remember how I am a work smarter not harder type of gal? This is where I’m going to not write out everything again and instead will just say, go to this link and learn what auto focus modes are, ok?
Autofocus Modes Explained *note: skip over the first explanation of Active vs Passive Auto Focus because I don’t want you to get too confused or hung up on that. Its just giving the background of focusing! Section 1.2 is where I’d recommend starting your reading at!
Welcome back! So now that you know what the modes are, what do I recommend you shoot in? Honestly, this is preference, but I personally recommend shooting in single point auto focus selection mode. This means that your camera will only uses one focus point that you choose in your viewfinder to acquire focus. I compose my photo and then choose a selection point and place it over my subject’s eye (or let’s say I was photographing an object, I’d put the selection point over the part of it I want most in focus) and then take my picture.
I already explained to set a focus mode of AIServo or Continuous for Nikon in a previous lesson, and I stick by using the mode. This is because I’m making an assumption that you’re shooting a moving target (like a kiddo on the move) and making the assumption that this is the best mode for YOU. I 99.9% of the time just leave my setting here and won’t change it. You do you though and feel free to try out other modes. You can read about the others in that same article in section two here!
I explain in the video how to change your mode and selection points, so just jump right on in below!
A few final notes about focusing:
When you’re first starting off with choosing selection modes, don’t get frustrated if you’re not super quick at it! You need practice to get faster and better at this, and everyone will stumble and be slow at first! Don’t be afraid to just jump in and start practicing!
Don’t beat yourself up if you miss focus. Especially when shooting backlit or into the sun, sometimes it’ll be hard for your camera to lock focus and get the shot clear. You also may not be quick enough to choose your focus point and miss the shot. THAT’S OK! I still miss focus ALL.THE.TIME! Sometimes I sill even include a completely out of focus shot in a gallery if the emotion and storytelling aspect is there. You do you, ya know!?
In the video I mention about back button focusing (BBF). It’s totally 100% a thing and so many people swear by it and that it’s easier and yada yada yada. Now, here’s what I say about that— try it out and see if ya like it! I personally am super quick with toggling my points and don’t need to BBF and found it was taking me longer to learn it. So I just never bothered to use it. 🤷🏼♀️ But you may find it WAY easier and want to use it! So if that’s the case, here’s some great resources for you!
BBF Resources:
Back Button Focus is Amazing: Learn What, Why, and How
Back Button Focus: What it Is and Why You Should Be Using It
OK friends, again it’s now YOUR turn to practice:
Practice training your eye to compose better in camera! Try out different techniques and see what you like to do for your story and images!
Learn how to use different focusing practices and practice so that you become quick and expert as switching up points!
As always, if you’ve got questions or just want to shout out that you’re following along and on this journey, drop a comment below or send me a DM on Instagram! I can’t wait to see what y’all learn from this series and hope you’re loving learning how to use your camera! 💙